Pimp your TL-MR3020 mobile router
The One-Watt Server

Many devices now run Linux – but mostly as a closed source firmware that you cannot access. We show how to use OpenWrt to free the TL-MR3020 router from its proprietary firmware and convert it into an all-around server for your home network.
TP-Link [1] manufactures routers in various performance classes. The TL-MR3020 (Figure 1) is marketed by the manufacturer as a mobile router because it is small and light. However, it does not support 3G (see the "Hardware" box), although you can upgrade via the USB port. Thus, the router is aimed at people who do not need 3G or have a UMTS stick and therefore do not want to invest in an expensive mobile UMTS router. However, the "normal" use of the router is not the focus of this article; instead, I will describe how to convert it into a mini-server.
Hardware
The TL-MR3020 is a small, white plastic box (Figure 1) measuring 7.4 x 6.7 x 2.2 centimeters and weighing only 60 grams. A mini-USB connector is used for the power supply, and the AC adapter provided supplies 1 watt. Moreover, the router will also work without any problems on a USB port. Additionally, the TL-MR3020 includes a USB 2.0 port and an RJ45 Ethernet port (100Mbps). TP-Link provides a short, flat patch cable for the latter. On the wireless side, the small router supports IEEE 802.11b/g/n at up to 150Mbps.
The TL-MR3020 uses five LEDs to indicate its status, four of which can be programmed. There is also a button for the wireless setup via WPS and a slide switch with three positions (3G/WISP/AP). Inside, the router has a 400MHz ARM CPU and 32MB RAM. The operating system resides on a 4MB flash chip. The USB port is used with the original firmware to connect a UMTS stick for operation as a mobile 3G router. Without a stick, the device acts as a wireless access point.
As a useful addition to the TL-MR3020, I would recommend a mini-USB hub by Pearl (Figure 1). This device integrates a micro-SDHC reader and thus provides the advanced root filesystem described in this article on a memory card without blocking the USB port.
The router board contains additional ports, but TP-Link does not route them out. If you can use a soldering iron, you could attach other components, such as a serial console, an I2C interface, or an external antenna. The OpenWrt wiki shows some pictures and links to relevant instructions on its TL-MR3020 pages [3].
 Figure 1: The TL-MR3020 TP-Link (left) is no larger than the palm of your hand. The mini-USB hub by Pearl (right) acts as an expander.
To do this, you'll replace the existing firmware with OpenWrt [2], a special Linux distribution for microdevices. OpenWrt has a package management system that is in no way inferior to that of classical distributions; thus, only the limitations of the hardware can curb your creativity.
Prelude
The TL-MR3020 is well-suited to this purpose for two reasons: On one hand, it costs EUR 30 (US$ 40) – which is not too much, if you happen to "brick" the device. On the other hand, the manufacturer does not put any obstacles in the way of installing third-party firmware.
To begin, download the correct version of OpenWrt [3] and follow the brief, but perfectly sufficient, instructions that come with the router to connect to the device's web interface. When you get there, upload the new firmware to the TL-MR3020 by selecting Upgrade in the new web form (Figure 2).
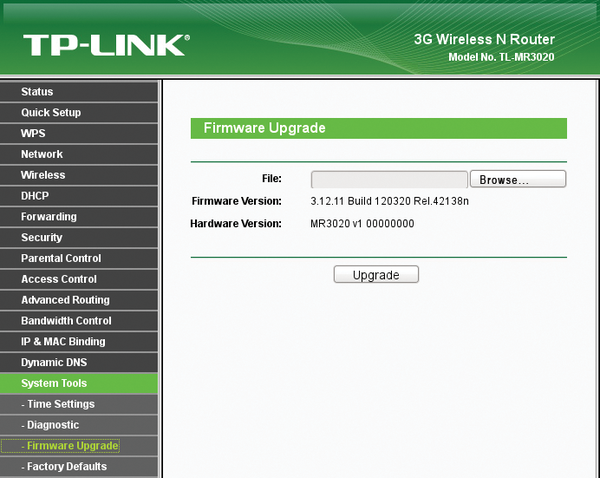 Figure 2: OpenWrt is uploaded as a firmware update via the original web interface on the TL-MR3020.
Uploading the firmware is the only really critical step in the whole process. A defective firmware image will send the router off to the happy hunting grounds – your only chance is a soldering iron. Thus, before loading the image, it is essential to check out the postings on the OpenWrt wiki [3] and follow the appropriate instructions.
After installing OpenWrt, the next step is the basic configuration, particularly for the network. Then, you need to set up a number of software packages that upgrade USB support for data media (USB sticks or hard disks). This step lets you boot the router from an external disk. On the now-extended root filesystem, you then add more software packages from the OpenWrt repository for the actual application.
First Contact
After the firmware upgrade and device reboot, you can connect your PC or laptop to the router with the use of a cable. Configure the network (you can normally use the network manager for this) and login via Telnet on 192.168.1.1 (Figure 3). The router runs a DHCP server that supplies a suitable address to your PC or laptop.
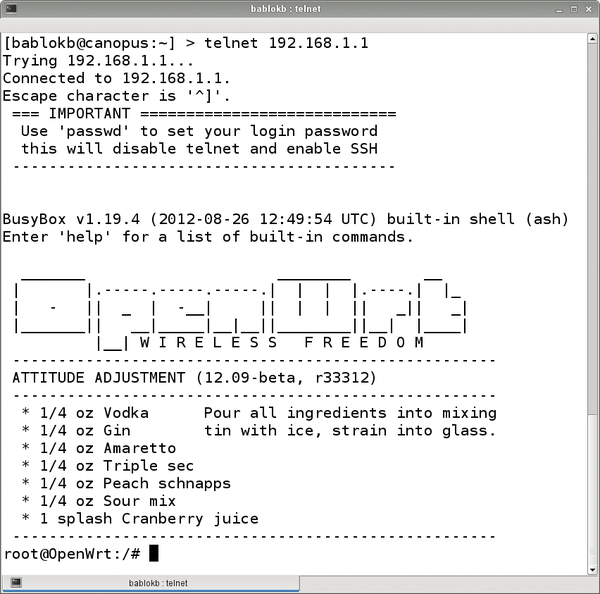 Figure 3: Done: The first login on OpenWrt.
At this point, you should set a password for root. OpenWrt then switches off the Telnet server for safety reasons and starts the SSH server. Next, adjust the network configuration so that the router is on your home network; then, you can move on and add more software. For details of the OpenWrt configuration system, see the "Configuring OpenWrt" box.
Configuring OpenWrt
The OpenWrt configuration system remains very consistent across all system-related packages. All configuration files are located in /etc/config and are simply structured plaintext files that are most easily changed in an editor.
For production operation of the router later on, the web interface is the preferred alternative to the editor: Here, you can conveniently modify individual configuration parameters and query the system state (Figure 4). Another alternative is an interface for the command line. The command
$ uci get system.slider.handler
reads the value of the handler option in the slider section of the /etc/config/system file. For scripts, the /lib/functions.sh library offers a few utilities that significantly facilitate the handling of settings.
 Figure 4: Using the web interface on OpenWrt to retrieve the system state.
To use the router as a server on your home network, the network configuration should look like Listing 1 (/etc/config/network) and Listing 2 (/etc/config/wireless). Lines 9-15 in Listing 1 configure the WLAN interface. In Listing 2, line 19 ensures that the server is integrated into the network as a WLAN client rather than as an access point or router.
Listing 1
/etc/config/network
Listing 2
/etc/config/wireless
After a reboot, the device should be found at the configured network address. If not, emergency mode can help: During the boot process, press the WPS button once it starts flashing. If the LED light flashes quickly, then release it again. Now the device is in Failsafe mode with the default address 192.168.1.1 and running the Telnet daemon. You can connect to Telnet and make the necessary corrections. However, no DHCP server is available on the router in this mode. You must assign a matching IP address to your own computer manually.
More Software
The original firmware image does not contain all the components that are necessary for running the root filesystem on a USB stick, so you will need to add them now. After successfully completing the network configuration, the mini-router can access the Internet and use the convenient package management system to install additional software retroactively.
The pivotal point is the opkg command, which you need to run as root. To do so, first call opkg update to upgrade the package list. Then, install the specified packages using the following command:
# opkg install <package>
If you are looking for a particular package, the list subcommand outputs a package list with brief descriptions. For the USB installation, you primarily need a set of kernel packages (Listing 3). It's best to partition and format the USB stick (/dev/sdb in the listing – you might need to adjust this) on your PC. Besides the root partition, you'll want a home partition and, above all, swap space.
Listing 3
Preparing the USB Stick
Then, you can simply plug the stick into the router and change the configuration of the mountpoints in the /etc/config/fstab file. Lines 10-16 in Listing 4 are important. The last line of Listing 3 copies the entire root filesystem to the stick. Creating a backup now is advisable. The system will still boot, even without the stick inserted: In this case, it simply ignores the nonexisting devices.
Listing 4
Configuring Mountpoints
After a reboot with a stick attached, you finally have more disk space. Any packages you now add can be stored there. All told, having the root filesystem on a USB device is handy. You can modify the configuration with the usual editors on a PC and easily copy data between locations (e.g., for backups).
At this point, the basic configuration is complete except for a few things, such as the hostname. The remainder of the procedure depends on how you will be using the router, and you can use the package manager to retrieve and configure the required software. The procedure on OpenWrt is no different from that of any other distribution.
Buttons and LEDs
By way of the web interface or SSH, you can completely control the TL-MR3020 as a mini-server. However, it is easier to use the existing buttons. The original WPS button is suitable for triggering individual actions, and the slide switch on the side (with its three positions) does the switching between different operating conditions (more about this later).
The LEDs serve as a kind of output device. Three different states are possible: on, off, or flashing. In combination with the buttons, you can build some nice features. From a technical point of view, you need to control the LEDs on files below /sys/class/leds (e.g., for the WPS LED, this is the /sys/class/leds/tp-link:green:wps directory). The makers of OpenWrt hide the complexity, and you normally only need to edit the configuration in the /etc/config/system file (Listing 5, lines 13-35).
Listing 5
Editing /etc/config/system
Typically, OpenWrt couples LED activity with the operating states of individual components, such as the network or USB interface. However, you can adjust the defaults to suit your needs.
Configuring the switch is also easy. You need to configure the event system kernel so that it triggers on the appropriate button events. To do this, edit the /etc/hotplug2.rules file and remove the caret before the ^Buttons string. Because this is an exception list, you enable events for buttons by removing the comment sign. From now on, the system runs all the scripts in the directory /etc/hotplug/button for each button event. The variables BUTTON and ACTION are set.
An example that demonstrates the interaction with the LEDs is shown in Listing 6. This script is only for the WPS button (line 22), and it causes the WPS LED to flash for three seconds (lines 6-8 and 10) then go off for another three seconds. When you release the button, the script turns on the LED again (line 19).
Listing 6
LED Interaction
Instead of storing each script individually in the Button directory and querying the status of the switch there, as in Listing 5, it makes sense to download a generic button script from the OpenWrt treasure trove [4]. Then, you can configure the switch similar to the LEDs in /etc/config/system.
The WPS button is configured as an off switch here: If you hold down the button for at least three, and a maximum of six, seconds and then let go, the system shuts down (lines 37-42 in Listing 5).
This step also reveals the meaning of the program in Listing 6; the button LED flashes for three seconds and then switches off for three seconds – so you do not have to count to shut down the system. Likewise, you could also use the WPS button to start another operation with short clicks. Listing 5 (lines 44-49) configures a log entry for demonstration purposes.
The Slide Switch
The slide switch on the TL-MR3020 is slightly trickier for two reasons. First, the kernel does not see the slide switch as one button but as two; mapping the three possible states takes 2 bits. Each change of the switch thus triggers two events, which reach the processing script sequentially but must be evaluated together. Second, the event system only sees the changes.
Now you can try a little script that checks the status of the slide switch while booting, for example, to configure the network environment. This aspect, however, is only hinted at in the OpenWrt wiki documentation. Listing 7 shows you how: The script stores the status of the two buttons BTN_0 and BTN_1 in appropriately named files under /var/run. The script runs once at startup, starting from /etc/rc.local.
Listing 7
Checking Status of the Slide Switch
In contrast, the script in Listing 8 runs for every button event. It updates the Status button in /var/run. Additionally, it starts a processing script. The extra magic in lines 10-12 ensures that only one processing script starts. The wait time before processing (line 21) ensures that all relevant button events are also received and processed. Lines 16 and 17 retrieve the processing script from the configuration file in /etc/config/system. The processing script then starts at line 22.
Listing 8
Updating the Status Button
An example of such a script is shown in Listing 9. It reads the status of the slide switch and reconfigures the network. The actual network files are only symbolic links; thus, the reconfiguration consists of pointing the symlinks at the new configuration files. For example, /etc/config/network.AP contains the network configuration when the slider is in the AP position. It makes sense to start the processing script once at startup time (in /etc/rc.local) after reading the slider status.
Listing 9
Processing Script
Conclusions
In this article, I've explained the hardware, so you "only" need to combine the individual components. For more detailed information about getting a UMTS stick to run, for example, or implementing specific network scenarios, please see the OpenWrt wiki.
The little TL-MR3020 router cannot cover every application (see the "More Application Examples" box). However, the mechanisms described here are at least similar for other devices, including those by other manufacturers. At the upper end of the power spectrum are the QNAP NAS devices that are supplied with OpenWrt in place. However, the range of preconfigured services makes customization more difficult.
More Application Examples
The usefulness of the TL-MR3020 is a result of its low power consumption and mobility. I use it as a synchronization server using the "Rsync for Android" app, and it synchronizes data between my mobile devices, the server, and other computers. On the road, the server acts as a router and emulates my home network, with no need to reconfigure my mobile zoo.
Further application scenarios for the TL-MR3020 can be found online through a simple web search. These range from web servers and VPN gateways to a simple social networking platform. To explore the computer's limits, I also installed ownCloud on the TL-MR3020. The application needs a web server and a complete PHP stack.
Basic functions, such as viewing and maintaining the calendar, do work, but slowly. Also, the TL-MR3020 crashed reproducibly while attempting to upload multiple images simultaneously. Perhaps a little tuning could tweak a bit more out of the box, but to run ownCloud seriously, you need something more powerful on the hardware side.
Infos
- TP-Link: http://www.tp-link.com.de
- OpenWrt project: https://openwrt.org
- Details for TL-MR3020: http://wiki.openwrt.org/toh/tp-link/tl-mr3020
- Generic processing of button events: https://dev.openwrt.org/browser/trunk/target/linux/atheros/base-files/etc/hotplug.d/button/00-button
The Author

Bernhard Bablok works at Allianz Managed Operations & Services SE as a SAP HR developer. When he's not listening to music, riding his bike, or walking, he focuses on topics relating to Linux and object orientation. You can contact him at mailto:mail@bablokb.de.