Using XML code in PHP scripts with XHP
Intertwined

The PHP XHP extension lets you use HTML and XML tags directly in the PHP code.
PHP scripts typically output HTML code that a browser then displays. Because many variables exist in the PHP code, the code itself can look kind of cryptic, as you can see in Listing 1. The code in Listing 1 dumps the contents of the $url variable in the <a> tag's href attribute, thus constructing a link to the ADMIN magazine website (Figure 1). The people who suffer most from this alphabet soup are template system developers who have difficulty identifying variables even in simple templates.
Listing 1
Simple Link in PHP
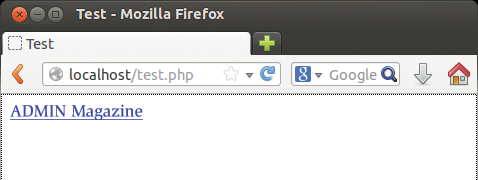 Figure 1: XHP generating a simple HTML link.
A PHP extension called XHP makes the code easier to read by letting you just add the HTML to the script and embed the PHP variables, as shown in Listing 2. XHP converts XML (and thus, HTML) blocks into valid PHP expressions. The resulting short notation reduces the error rate and helps programmers maintain an overview.
Listing 2
Simple Link with XHP
XHP primarily processes XML code and does not process certain lax HTML rules correctly. For example, echo <img src={$file}>; outputs an error because the tag is not closed correctly. The following would be correct: echo <img src={$file} />;. XHP also pays meticulous attention to correct start and end tags. <h1>Hello World!</h2> causes processing to stop. In general, you only see a blank page in this case. However, XHP adds missing quotes to attributes (e.g., the quotes for href in Listing 2).
Pitfalls
For Listing 2 to work, you need to integrate the init.php file included in the XHP source code tarball; in turn, it will pick up its dependencies: core.php and html.php. Ultimately, you are forced to provide all three files with your own web application. The XHP extension itself simply evaluates the XML syntax; the PHP files I just mentioned take care of everything else. This bunch of three resides either in the php-lib subdirectory in the source archive or directly on GitHub [1]. Listing 2 deliberately omits a document type definition. The following line would cause an error:
echo <!DOCTYPE html>;
This explains the special element x:doctype for HTML5 documents. If you encapsulate the content between <x:doctype> and </x:doctype>, XHP automatically adds the document type definition, <!DOCTYPE html>. Listing 3 gives an example (Figure 2).
Listing 3
HTML5 doctype
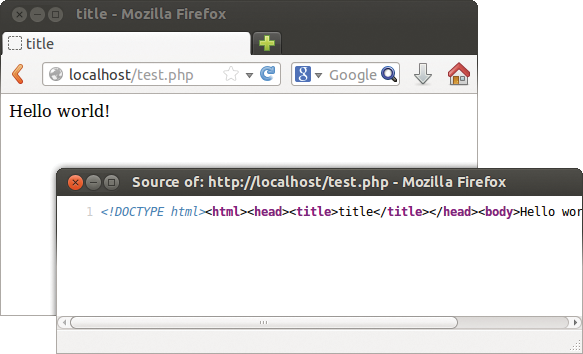 Figure 2: XHP replaces the x:doctype element with an HTML5 document type definition (see Listing 3).
You definitely need to pay attention to the final semicolon. It is easy to forget the semicolon when programming, especially if the HTML code covers several lines, as shown in Listing 3. The content inside the braces { } is interpreted by XHP as a complete PHP expression; it is not allowed to simply contain a variable (as in PHP). Thus, typing:
echo <p>{1+1}</p>;outputs 2 in the browser.
Installation
The XHP installation process is designed for Linux systems; a .dll for Windows does not exist. XHP officially supports PHP versions 5.2 and 5.3, but it also ran under Debian 7 with PHP 5.4.
To install XHP on a plain vanilla Ubuntu 13.04 or Debian 7, be sure to install Apache, along with PHP 5 and its developer package first:
sudo apt-get install apache2 php5 php5-dev
To compile XHP, you also need GCC 4.0 together with G++ 4.0, Flex version 2.5.35 or later, Bison version 2.3 or later, and Re2c version 0.13.5 or later:
sudo apt-get install build-essential flex bison re2c
Now you can either download the source code [1] from GitHub by pressing the Zip button or clone the repository using git :
git clone git://github.com/facebook/xhp.git
Then, build XHP with the following three steps:
phpize
./configure
make
If you enter make test, you check the build.
To install the system, issue the command:
sudo make install
You need to enable the new extension in php.ini. On Debian and Ubuntu, the configuration file is located in /etc/php5/apache2. Add the following line:
extension=xhp.so
Depending on your installation, you might need to add the full path for xhp.so, as stated in sudo make install output. After you restart the web server by issuing sudo /etc/init.d/apache2 restart, Listing 2 should work. On Ubuntu and Debian, you need the listing in the /var/www directory; you can save it as test.php, for example. You also need to dump the PHP file from the php-lib subdirectory in the XHP source code archive into /var/www before you can view the results in a browser on http://localhost/test.php. Alternatively, you can check the results at the command line with the following (see Figure 3):
php -r 'echo "XHP!\n"; exit; <a />;'.
Debian and Ubuntu assign the command-line interpreter for PHP a separate php.ini, which resides in the /etc/php5/cli subdirectory. Enter XHP from this /etc/php5/cli subdirectory; otherwise, the call will fail.
 Figure 3: If the extension is working properly and is registered for the command-line interpreter in the php.ini file, this message should appear.
Escape Characters
In Listing 4, a user could easily type in HTML code in the box and then inject this code into the page. However XHP automatically defuses XML and HTML code (escaping) with matching characters or entities. If the user types angle brackets <<, as shown in Figure 4, XHP creates the entity < from it. In pure PHP, you would use the htmlspecialchars() function for this [2] as in the following:
Listing 4
Escaping Example
 Figure 4: The HTML tags entered here end up as text in the output (see Listing 4).
echo '<p>Your input: '.htmlspecialchars($_POST['input']).'</p>';
which is, in fact, equivalent to line 4 in Listing 4.
Objectively Attached
XHP uses an extremely sophisticated approach under the hood. It does not just stubbornly output all the tags that follow echo but creates a separate PHP object for each XML or HTML element. For example, the statement
$list = <ul />;
is not followed by the <ul /> but by an object representing the HTML list. All objects created in this way by XHP automatically have an appendChild() method to make it easier to add more child elements. Listing 5 shows an example: It first creates an empty, unnumbered list <ul />. Then, it iterates through the elements of the $number array and generates a new value for each list entry <li> … </li>. The result is shown in Figure 5. XHP ignores all whitespace; spaces are between the individual elements. Thus, XHP converts this:
<p>Hello World</p>
to Hello World .
Listing 5
Using appendChild()
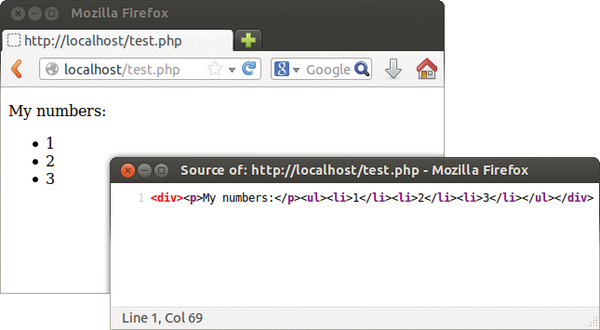 Figure 5: appendChild() has created more li elements (see Listing 5).
Classic
Besides the specified HTML elements, users can also define their own. It saves a huge amount of time if you just need to add a tag like <ingredients/>, which is swapped automatically by XHP for an HTML list with ingredients. In this way, you can quickly put together a template engine. To use an individual element, you only need to create a new class; however, a couple of conditions apply to the class: It must be derived from the :x:element parent class, which – among other things – provides the appendChild() introduced earlier. Also, the class name must use the tag name and start with a colon. Finally, you need to implement the render() function, which returns XHP objects.
Listing 6 gives an example. The code in Listing 6 creates a new element called ingredients. The first step is to define a matching :ingredients class. This teaches XHP the <ingredients /> tag. Once it shows up somewhere in the PHP code, XHP creates the object. (See line 7 of Listing 6.) Once echo outputs the element, XHP automatically calls the render() method, which returns a small list. At this point, Listing 6 uses a little trick: The <ul> ... </ul> list returned by render() is automatically transformed by XHP into an XHP object. In other words, render() returns an XHP object, as requested. Returning the string An article, however, would result in an error.
Listing 6
Class Definition Example
Listing 6 declares the :ingredients class (Figure 6). Apparently with a view to XML namespaces, XHP classes use a prefix separated by a colon from the actual name. Here, you could select the admin prefix so that the entire class goes by the name of admin:ingredients and the tag is thus <admin:ingredients />. However, this is just a convention; you can leave out the prefix (or namespace) in your own projects.
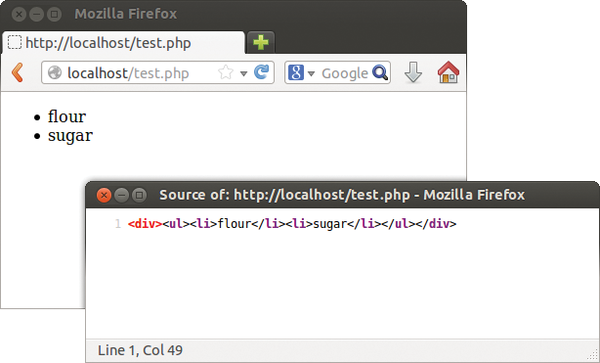 Figure 6: The ingredients element automatically returns the list (see Listing 6).
How Primitive
The render() method must always return XHP objects. If you only want to return a string, you have to derive your own class from the x:primitive parent class. However, this class is explicitly designed for "low-level elements," such as the HTML elements a or h1 that need to output the markup or tags. In contrast to x:element, classes derived from x:primitive need to implement the stringify() method, which in turn returns the string that also ends up in the output later. Listing 7 shows an example of an element named ingredient. Its stringify() method simply outputs the <div>flour</div> string.
Listing 7
Derivatives of :x:primitive
Listing 6 and Listing 7 do not worry about their child elements. In the following case,
echo <admin:ingredient> <div>sugar</div> </admin:ingredient>;
the output would still be flour, as shown in Figure 7. <div>sugar</div> is a child element of admin:ingredient.
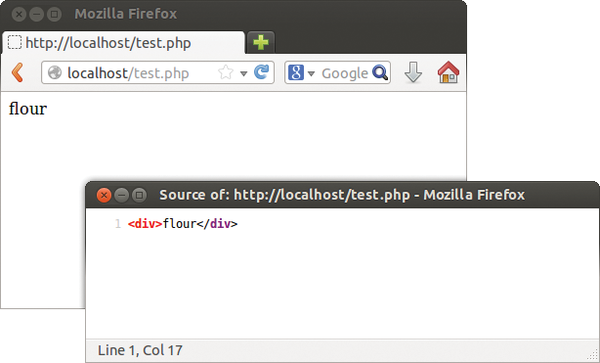 Figure 7: Instead of div, stringify() could also output user-defined tags (see Listing 7).
A loop is needed in stringify() to iterate through all the child elements and integrate them into the output (Figure 8). Listing 8 shows the loop: It uses the getChildren() method to return all the child elements of the object. The code in Listing 8 is available to all classes derived from x:element.
Listing 8
Evaluating the Child Elements
 Figure 8: In this case, ingredient also outputs its child element (see Listing 8), which consists of a div element.
Characteristics
If an element has attributes, you can list them just as easily as in Listing 9 with the attribute keyword. In Listing 9, the element admin:auto receives exactly two attributes. The first is brand; it accepts strings and defaults to a value of Ferrari. The attribute name is followed by @require, stating the attribute is mandatory. Its colleague color can only assume two possible values: blue and red.
Listing 9
Defining Attributes
You can access the attributes using the getAttributes() method (Figure 9), which can then be output in a loop (see Listing 9) within render(). getAttributes() is also available to any class derived from x:primitive.
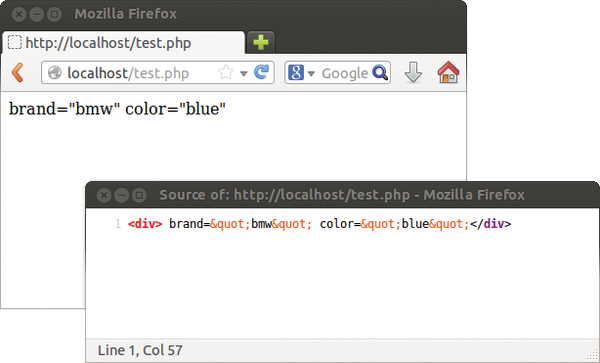 Figure 9: Attributes are evaluated using the getAttributes() function (see Listing 9).
Rules
A blog post always possesses at least a title, an introduction, and an optional body text. To express such conditions, XHP has the keyword children (see Listing 10).
Listing 10
Defining Permissible Child Elements
An admin:post must contain at least one admin:header and one admin:introduction. The notation is based on regular expressions.
Table 1 lists all operators that XHP understands. During processing, XHP checks these conditions and aborts if they do not apply. In Listing 10,
<admin:post> <admin:header /> <admin:introduction /> </admin:post>
would be accepted, but the missing introduction,
<admin:post> <admin:header /> </admin:post>
would not.
Table 1
Operators for Children
| Symbol | Meaning |
|---|---|
|
|
Zero elements or one element |
|
|
Zero or multiple elements |
|
|
One or multiple elements |
|
|
Or (one of conditions listed to the left and right of | must apply) |
|
|
The elements listed with a comma must appear in this order |
|
|
Arbitrary child elements are allowed |
|
|
No child elements are allowed |
The XHP developers explicitly point out that the underlying "greedy" algorithm takes preference. The children (:elem*, :elem); condition thus triggers an error: The * already covers all :elem; another :elem thus cannot follow.
If you need to enumerate many elements, you can simplify the task with element categories. In Listing 11, admin:retweet and admin:tweet belong to the admin:twittercategory category. admin:twitter can have any number of child elements, but they must come from the admin:twittercategory category.
Listing 11
Use of Element Categories
The x:element and x:primitive classes are defined in the code.php file. The comments stored in these classes also provide the only existing reference documentation. However, the html.php file contains classes for all HTML elements; for example, :ul handles the ul list. Incidentally, the html.php file also defines the x:doctype class, which in turn represents the previously mentioned HTML5 document type definition <!DOCTYPE html>. You currently need to create your own classes for other doctypes, such as XHTML.
The XHP documentation leaves much to be desired. As an introduction, you can read the README.textile file from the source code archive, which you will also find on GitHub [1]. Additionally, you will find a pretty spartan wiki [3] and the blog posts by Facebook developer Stefan Parker [4]. Among other things, Parker shows how to parameterize CSS code in quite an elegant way using XHP [5].
Conclusions
XHP simplifies programming and input filtering. For example, XHP checks for correct nesting. Unknown elements have no output, and expressions in braces { … } are directly processed by htmlspecialchars().
Additionally, XHP is quite strict and, for example, takes exception to forgotten or incorrect end tags. Finally, you can quickly create building blocks for a template system using your own elements and tags.
On the other hand, converting the tags into objects costs computing time; in fact, this can be massively expensive depending on the code and usage. According to a comment in the XHP source code, the developers actually expect the APC cache system to be used as an accelerator [6] [7].
Administrators also need to compile, provision, and maintain the extension itself, which is not possible with some web hosting providers. Finally, improved readability depends strongly on the HTML code.
Infos
- XHP: https://github.com/facebook/xhp/tree/master/php-lib
- Documentation on
htmlspecialchars(): http://php.net/manual/de/function.htmlspecialchars.php - XHP wiki: https://github.com/facebook/xhp/wiki/_pages
- Stefan Parker's blog: http://codebeforethehorse.tumblr.com/
- Stefan Parker: Abstracting CSS with XHP: http://codebeforethehorse.tumblr.com/post/3504948746/abstracting-css-with-xhp
ext.cppfile: https://github.com/facebook/xhp/blob/master/ext.cpp- APC: http://php.net/manual/en/book.apc.php