What's new in openSUSE 11.0
Kicking the Tires

© Mechanik, Fotolia
The second major release since SUSE became a community project is looking good. We took openSUSE 11.0 for a test ride.
The first SUSE Linux release – an open source Linux distribution developed entirely by a company known as SUSE – arrived in 1994.
In 2005, Novell acquired SUSE and later announced plans to open up the development process to community involvement.
SUSE Linux 10.0 was released in October 2005 and was the first SUSE release to have public beta testing. Version 10.3, now named openSUSE, was released in October 2007.
Novell's commercial version of Linux, SUSE Linux Enterprise, is based on openSUSE. I took a closer look at the openSUSE 11.0 release candidate soon before the final release.
What's Inside
OpenSUSE 11.0 includes the default kernel 2.6.25.4-8, either the Gnome 2.22 or KDE 4 desktop, Firefox 3 (beta 5), and OpenOffice version 2.4.0. GIMP 2.4.5 is not a default install but it is included. The Evolution Mail and PIM client, Tasque task manager, Ekiga software (for VoIP and other similar applications), and Pidgin instant messaging client are all installed by default.
Install
To get openSUSE 11.0, you can download either a CD or a DVD, but currently the DVD is only available via BitTorrent. If using the CD, you have to choose either Gnome or KDE, although you can add the other desktop post-install. The CD is a Live CD, so you're free to try it out before you actually go for the full install. For my review, I downloaded the Gnome 2.2 version of the Live CD.
The initial CD boot screen gives you a choice of languages via a nice graphical splash screen. Booting from here took a while on my slightly elderly test machine, and it gave a few console log messages ("Backtrace…") that might be alarming to a new user. At least some previous versions of SUSE have had a graphical boot process that hides the full boot console text by default but also gives you the option to see it.
After the Live CD booted, everything seemed to work fine. One slight niggle was that my UK keyboard wasn't picked up – I got a US keyboard map instead – which is a shame considering that I was able to choose UK English as the language. The install procedure is standard for a Live CD distribution, with a big Install button to click (Figure 1).
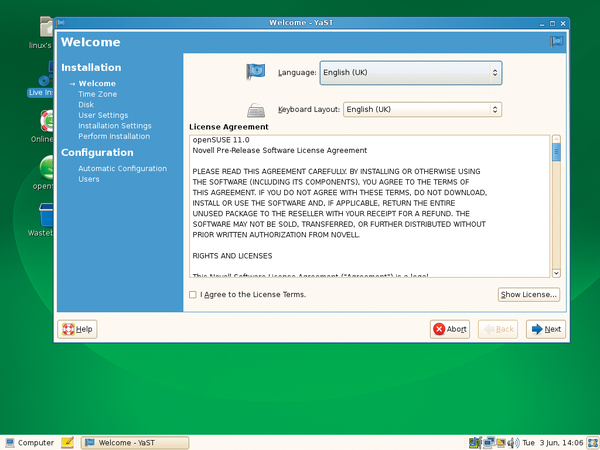 Figure 1: Installing from the Live CD.
The install procedure was largely straightforward, and my keyboard issue was rapidly corrected; however, there was a slight problem with partitioning. The install process automatically generates a suggested partitioning, which in my case would have involved deleting, resizing, and writing over both of my existing partitions, although I only wanted the / partition to be formatted.
I chose Manual partition, but the partition table I was given to edit was the new one, and it wasn't clear what changes had been made to my old partition setup. I had to click reread partition to get my old partitioning back and restart from there. Although you are asked for confirmation before any new partition table is written to disk, this would have been a little confusing for new users who wanted to keep part of their old setup. On the other hand, the proposed re-partition is sensible if you are happy to lose all your current data.
Pretty much everything else in the installation is done for you – the installer guesses reasonable defaults and then offers you the option to change them. Other than the partitioning, I left the installer to it and got a sensible set of defaults. Also, it picked up my DHCP network with no problems.
To finish the install, just reboot. This is a slightly old-fashioned approach; it would be better if all configuration was done before the reboot. After rebooting, everything attempts to configure itself automatically. In my case, this was entirely successful. (I liked the "do not panic!" message when X11 turns itself off and on again to check its settings.)
I could have done with a bit more clarity when setting up users – you set up a regular user first, and then the root user. I was expecting the other way around and was uncertain whether I should be using the first screen to set up root. When I tried to do so, permission was refused because root already existed; the root password was set on the next screen.
Perhaps this is intended to be new-user friendly, but in that case, I'd have expected more explanation of what the root password would do.
I also found the repository list not entirely user friendly, with a long list of repositories, some of which are labeled "recommended." However, to find these "recommended" repositories, you must scroll through the information on each to see the note at the bottom.
Additionally, at the top of the list is a developer repository labeled as expert-only. Splitting the repositories into two lists – "recommended" and "extra" – might be more helpful to the beginner, or even to an experienced user who isn't familiar with the openSUSE repository setup.
The install process provided a relatively small set of packages, and I had to install other programs manually. On the upside, this leaves you with plenty of disk space, and openSUSE will install happily into a relatively small partition; my installation used about 2GB. On the downside, this makes it a little less usable out of the box. For example, I had to install Vim manually. Also, you'll need to run an update immediately, but it's not clear how to do so. I updated via the install manager, but I expected something more obvious.
New Features
OpenSUSE 11.0 includes a long list of new features, most of which are bug fixes that shouldn't be that obvious to the user, but others are worth a closer look. One new feature is that ext3 fsck check has been switched off. On most systems, this is the check that is set to run after a number of days without fsck being run. With a journaling file system such as ext3, this shouldn't be necessary, and it invariably crops up at the most inconvenient time for the user. I've been bitten before by an unexpected reboot taking far more time than I'd wanted because of this, which can be a real nuisance if, for example, you're recovering from a power outage.
Packages can now be filtered by keyword in YaST, which is a first in a Linux distribution, according to the openSUSE development team. This does seem like a big improvement – my experience with Debian is that you have to do your package research outside the install tool. With openSUSE, you can do it from within the install screen, which is faster.
UMTS network cards are now supported, and tablet PC support was improved. PDAs and mobile phones are now plug-and-play (although I didn't test this myself). For CUPS and LPD, various printer idiosyncrasies have been fixed. On the desktop, an easy time/date applet has been added and works as expected. Overall, nothing too dramatic, but a sensible set of improvements.
Working with openSUSE
The first thing that struck me was that there is no obvious way of running updates automatically. Instead, if you open yast2, the install manager, you can choose the updates pane. However, you physically must select all packages. No Update All button is provided and I couldn't find an appropriate command-line option; nor did I see a tray icon or other indication that updates were needed.
On the other hand, installing updates via yast2 is straightforward. To help you find your package, there's a search box, or you can browse through the various package sections, as shown in Figure 2. Dependencies are downloaded automatically; however, the install manager does take quite some time – several seconds on my machine – to start up. I have quite a few old and fairly slow machines, but this delay is more than I've seen when checking for updates in other distributions.
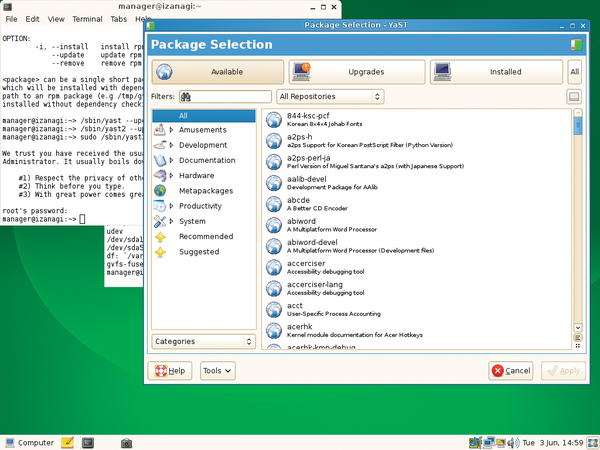 Figure 2: The YaST install manager.
The menu in the bottom left-hand side of the screen resembles the Windows XP Start menu, showing often-used and recently used applications (Figure 3). I can't find any option to change the layout or setup of this menu, and opening applications not in the default menu is quite slow. Buttons, however, are easy to create on the taskbar by drag-and-drop.
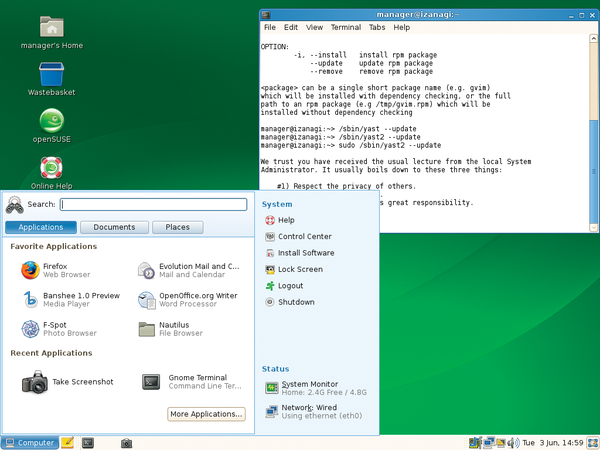 Figure 3: Windows-esque Start menu.
I liked the "connection information" option in the menu, but it gave the wrong IP address. The right address was set and networking was working fine, so I'm not sure what the problem was.
A selection of programs are set to start automatically, which you can change from the Control Center. By default, programs include the touchpad manager, which seems odd if you don't have a touchpad (I didn't). Although this is intended to help with laptops, I'm surprised that it didn't detect the presence or absence of a touchpad and run setup accordingly during install.
The default browser, Firefox 3 (beta 5), seems like a reasonable decision, considering it's pretty stable already and Firefox 2 is starting to look a bit old.
The Tomboy Notes program, which I hadn't used before, is a default install with a shortcut button in the menu bar at the bottom of the screen. Tomboy lets you create new notes, access them with keyboard shortcuts, and link them to each other, similar to a personal wiki-lite. Figure 4 shows multiple linked notes and the search dialog.
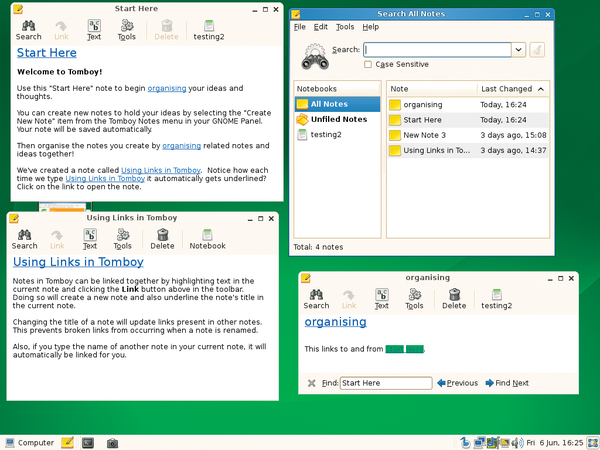 Figure 4: Tomboy, the built-in notes program.
Also, Tomboy can be sychronized to a local folder or off-site via SSH or WebDAV.
The Control Center provides a graphical interface for managing various settings, creating new users, and so on (see Figure 5). In the Control Center (as root), you can launch YaST, which controls non-user system basics such as mail, LDAP, NIS, firewalling, and so on (see Figure 6).
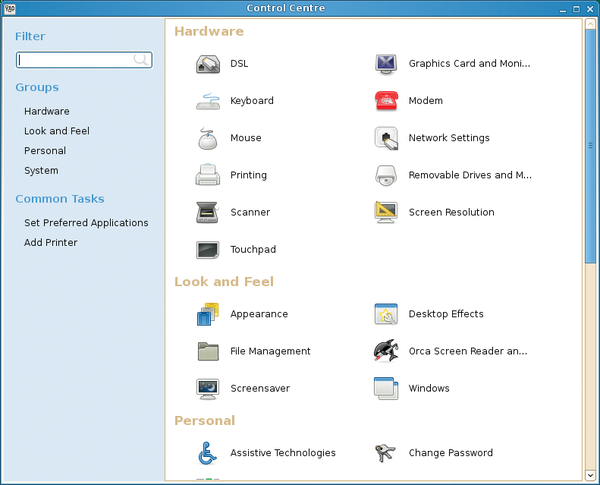 Figure 5: Changing user setup in the Control Center.
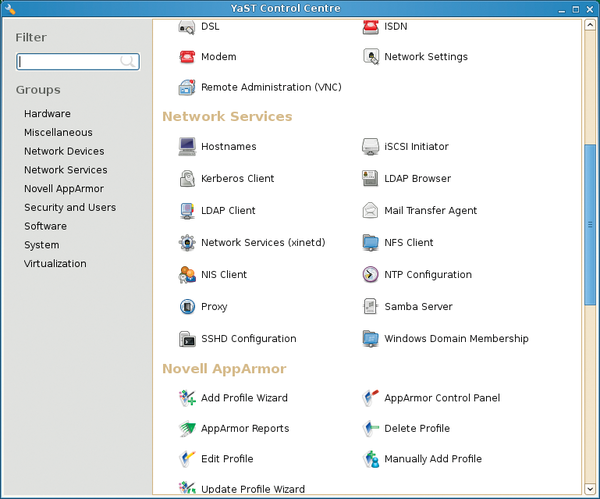 Figure 6: System management with YaST.
One significant problem I encountered was that the default firewall rules block SSH into the machine. Nowhere on the firewall interface did I see where this could be resolved readily, without turning the firewall of completely.
Media Player
Banshee, the default media player, handles both video and music and includes a Last.FM default option in the sidebar (Figure 7). Initially, I wasn't able to get this working and was given no error messages.
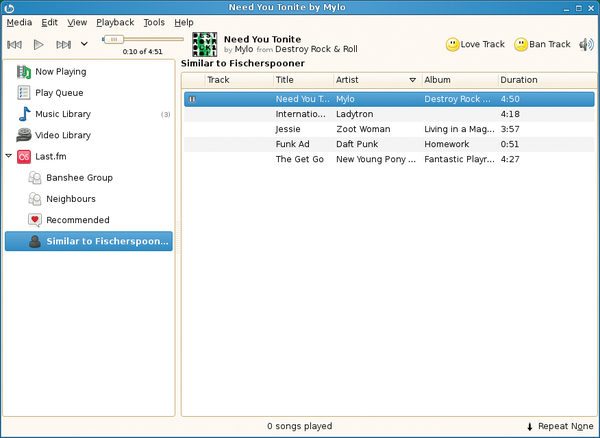 Figure 7: Banshee and its Last.FM interface.
When I installed Rhythmbox and tried again, I discovered that the problem was that the MP3 codecs aren't installed by default. Rhythmbox alerted me and opened an openSUSE web page from which I could install the codec package (Figure 8). With a single click, I installed the package and then restarted Rhythmbox.
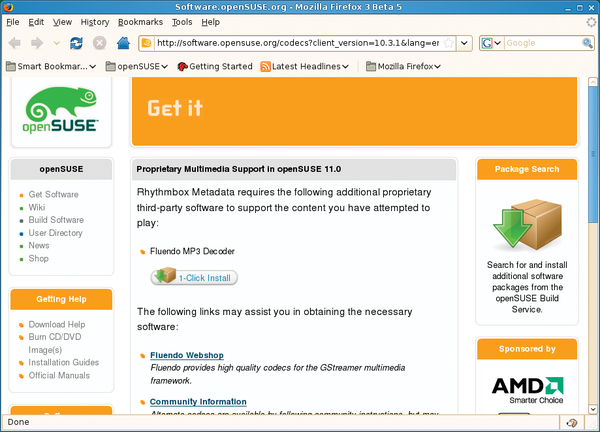 Figure 8: The page to install the MP3 codecs.
After this, Banshee worked fine and I liked the Last.FM interface, but it's too bad that the program wasn't able to launch the same process that Rhythmbox did.
Flash isn't included by default, but a Flash Player package is available and, once installed, it works automatically with Firefox.
Conclusions
Overall, openSUSE 11.0 strikes a balance between accommodating new users and experts. Under the hood, there's a lot of power while also keeping ease of use in mind. I was impressed by the extent to which many things, such as Flash with Firefox, simply worked. Even as someone who has spent years Linux-wrangling, I much prefer it when wrangling is minimal! Also, YaST is reminiscent of the well-done Mac System Preferences.
However, there are some odd choices, such as the inability to change the main menu layout and the apparent lack of ease of running security updates. Also, I was disappointed that MP3 codecs weren't included by default, or, if this wasn't possible for legal reasons, that the built-in media player couldn't alert users to that problem. This could baffle a novice user and turn people away from trying – or sticking with – Linux.
Overall, 11.0 is a nice effort from the openSUSE team, with just a few niggles that hopefully will be fixed in the next release.