
NoMachine remote desktop solution on Linux
Manual
Additionally, the software lets you manually connect to other computers. To do this, press the New button and open the appropriate wizard in the connection display. In the first step, define the protocol; only the NX protocol is enabled in the free variant. Next, enter the IP address of the remote host and the port you are using in the second dialog.
In the third step, define the authentication method. There are several options to choose from, although in the private sector and small companies with few workstations, it is usually fine to log in with the system login. In larger environments, authentication using a private key, chip card, or Kerberos ticket is recommended.
Now, tell the software whether you want to establish the connection directly or use a proxy server. Finally, assign a name for the configuration, and exit the wizard by clicking Done, thus adding the new connection to the list (Figure 3).
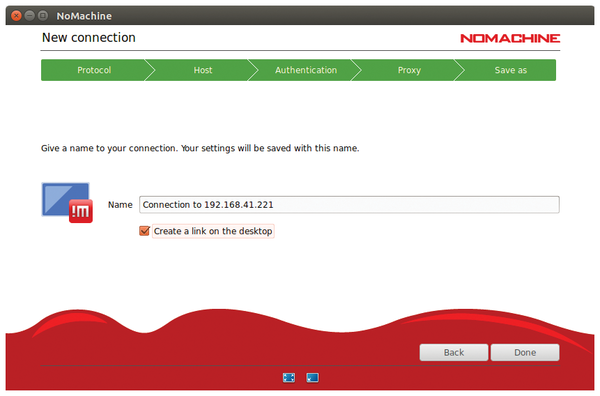 Figure 3: You can manually set up new connections in just a few steps.
If you are connected to a remote NoMachine server and you see its screen contents on your own screen, it makes sense to tweak some more details. If you mouse over the upper right corner of the duplicated screen, a tab opens; then, left-click to see the dialog with the settings. This is where you can adjust the remote system's screen resolution and window size to suit your local client and also modify other parameters using the various groups displayed.
There are options for enabling the microphone on the remote NX server, changing the volume, or recording the entire session. The option to integrate drives and printers in the Devices special menu is particularly relevant for terminal operation. NoMachine supports bidirectional use. This means, for example, that USB drives connected locally to the client are available to the user on the remote machine. Additionally, the software detects USB or other drives attached to the remote computer and lists them in the settings (Figure 4).
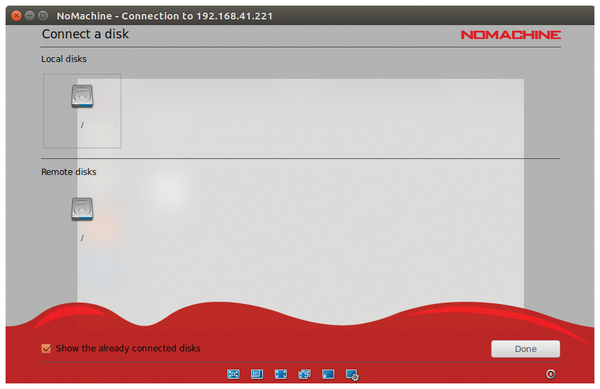 Figure 4: NoMachine allows you to use different peripheral devices.
By clicking on the respective drive, you can integrate it into the client system. The program creates a folder in which you can access the corresponding content as well as local data. A green dot next to the drive name in the settings indicates successful integration. You can close the settings window and release the remote system screen by clicking Done.
Signs of Disintegration
NoMachine does not automatically scale the remote system's contents on the local client. As a result, errors occur relatively frequently, especially with the different screen resolutions of the systems involved. To make changes to the resolution at any time, the software lets you open the dialog with the settings by clicking Ctrl+Alt+0. The most common options – full-screen operation of the remote system on the local screen and use in a local window – are available at the push of a button.
After opening the dialog, you will find the options to customize the screen at the bottom of the window (Figure 5). The screen symbol on the right-hand side of the screen lets you set the general options. If you want to adjust them during a session, you can do this on the fly with the other icons. You may have to change an input device's settings to avoid seeing double when you look at the mouse cursor.
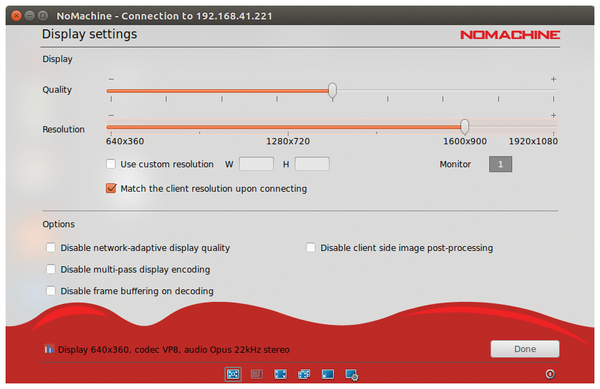 Figure 5: In a separate dialog box, you can adjust the screen resolution.
While the on-the-fly settings take effect immediately, options modified for all sessions are generally only enabled after restarting the software.
Status Displays
The software provides information about a connection during a session. To do this, call the dashboard during operation with Ctrl+Alt+0 and select the Connection option. The most important data now appears in a new dialog box (Figure 6).
 Figure 6: The software lists important status characteristics, if needed.
Alternatively, you can view status information with the use of an applet in the desktop's system tray. During the program installation, the routine also creates a Show the Server Status launcher, which also reveals important connection details when the application is active. In addition to the actual server status, you can see the connected users and transmission processes in the resulting dialog.
« Previous 1 2 3 Next »
Buy this article as PDF
(incl. VAT)
Buy Linux Magazine
US / Canada
UK / Australia
Subscribe to our Linux Newsletters
Find Linux and Open Source Jobs
Subscribe to our ADMIN Newsletters
Support Our Work
Linux Magazine content is made possible with support from readers like you. Please consider contributing when you’ve found an article to be beneficial.

News
-
Linux Servers Targeted by Akira Ransomware
A group of bad actors who have already extorted $42 million have their sights set on the Linux platform.
-
TUXEDO Computers Unveils Linux Laptop Featuring AMD Ryzen CPU
This latest release is the first laptop to include the new CPU from Ryzen and Linux preinstalled.
-
XZ Gets the All-Clear
The back door xz vulnerability has been officially reverted for Fedora 40 and versions 38 and 39 were never affected.
-
Canonical Collaborates with Qualcomm on New Venture
This new joint effort is geared toward bringing Ubuntu and Ubuntu Core to Qualcomm-powered devices.
-
Kodi 21.0 Open-Source Entertainment Hub Released
After a year of development, the award-winning Kodi cross-platform, media center software is now available with many new additions and improvements.
-
Linux Usage Increases in Two Key Areas
If market share is your thing, you'll be happy to know that Linux is on the rise in two areas that, if they keep climbing, could have serious meaning for Linux's future.
-
Vulnerability Discovered in xz Libraries
An urgent alert for Fedora 40 has been posted and users should pay attention.
-
Canonical Bumps LTS Support to 12 years
If you're worried that your Ubuntu LTS release won't be supported long enough to last, Canonical has a surprise for you in the form of 12 years of security coverage.
-
Fedora 40 Beta Released Soon
With the official release of Fedora 40 coming in April, it's almost time to download the beta and see what's new.
-
New Pentesting Distribution to Compete with Kali Linux
SnoopGod is now available for your testing needs