
Choosing a graphical backup tool
luckyBackup
Another backup solution based on Rsync is luckyBackup [5]. You'll find luckyBackup in the software archives of all the mainstream Linux distributions. The installation routine creates a launcher, which opens a program window with an unusual layout. In addition to a conventional menu and buttonbar, you will find a task list with some controls and an information window that displays notifications and messages from the application.
LuckyBackup relies on profiles for different backup tasks; this means that you don't have to specify the source and target directories manually every time you start the application. You can switch between the individual profiles using a selection box in the buttonbar. At first there is only the default profile. To create a new profile, click on Profiles in the menubar and select the New option. Enter the name of the new profile, which luckyBackup will then add to the profile list.
The next step is to start defining tasks for the new profile. Click the Add button in the Task column. Enter the name of the task and specify the source and target directories. Once you have added one or more tasks, you can check them for correct operation in a simulation mode (Figure 7). LuckyBackup indicates the end of the test by displaying a message in purple.
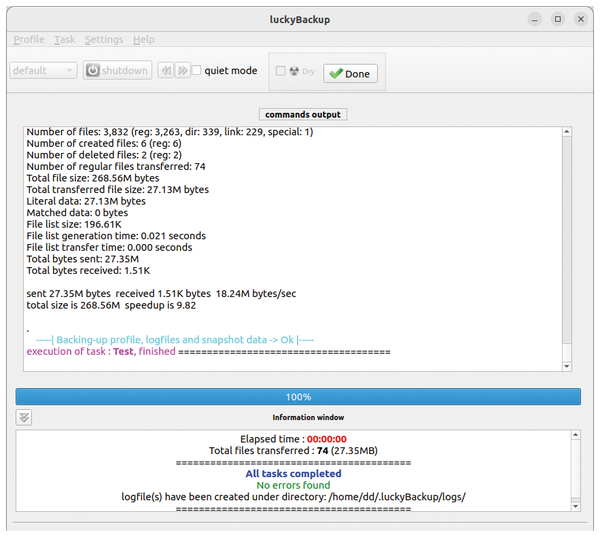 Figure 7: You can also perform a dry run in luckyBackup.
You can modify a task after it has been created. Select the task and then click Edit. In the properties dialog, edit the properties, or click Advanced to tweak additional settings. Several tabs let you exclude or include directories, define various options for links, and specify a remote computer as the target or source. You can also set up an encrypted SSH connection.
LuckyBackup also supports fully automated, scheduled backups. Click on the clock icon or select Schedule from the Profiles menu.
In the settings dialog, you will need to create an execution plan for each profile. In addition to the time, you can specify the days of the week, the months, or alternatively, days in the month, on which a backup will be created. Once you have set the dates for the backup, click on Okay and then click CronIT to save the values.
After completing the configuration, you can start a manual backup by unchecking the Simulation option in the application's main window and then pressing Run. LuckyBackup displays messages in the command-line output and shows you a progress bar. Depending on the size of the files and folders and the speed of the source and destination media, the backup can take a while to complete.
LuckyBackup does not offer an option that is labeled Restore. Instead, you use the Manage Backup option in the Task menu to restore your data. You will find a list of existing backups, including the profiles and task definitions on the left (Figure 8). The associated files in the source and target directories appear in two larger areas on the right. You can view the corresponding log in a separate window by clicking the View log button.
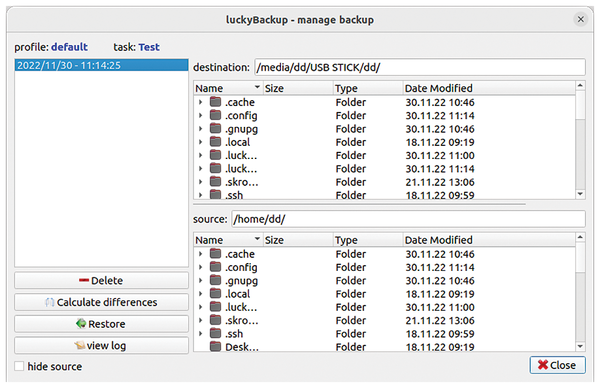 Figure 8: Options for varying the data restore.
For an overview of the differences between the source and target directories, use the Calculate Differences option. Instead of the target, a table of differences between the existing dataset and its backup now appears in the top right corner of the window. To restore the highlighted backup, click the Restore button. LuckyBackup will now prompt you for the restore path. A checkbox lets you choose to delete existing files in the source directory that are missing from the backup.
If you first want to determine whether the restore will work without trouble, you can simulate the data restore by checking Simulation. Then press Start. The tool will perform a dry run of the restore, reporting on any errors it encounters.
Timeshift
Timeshift [6] is one of the best-known backup programs for Linux desktops, which is why it crops up in the software repositories of virtually all of the mainstream distributions. Timeshift relies on Rsync to create snapshots, but it can also handle the Btrfs filesystem, which natively supports snapshots.
After launching Timeshift for the first time and authenticating as the system administrator, you will first be asked if you want to select Rsync or Btrfs as the snapshot type. The program then calculates the system size and, on the next screen, displays the capacity and free space of all storage media mounted on the system and the partitions on those media. From this list, you can choose the target location for saving the new snapshots you will be creating.
Timeshift (Figure 9) does not support the filesystems of other operating systems. If you want to use a removable medium such as a USB stick as the target medium, you need to format it with a Linux-compatible filesystem. After completing the settings, press Next. You then need to specify how often you want the system to be backed up and how many backups Timeshift will keep each time. The tool saves your configuration as a cron job.
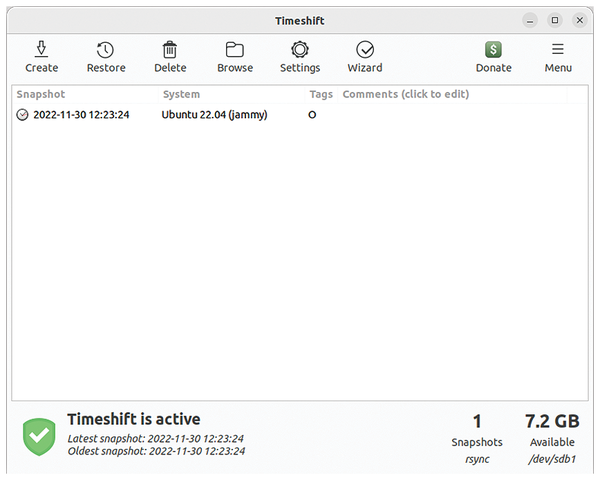 Figure 9: Timeshift is ready to use after a few mouse clicks.
In the next wizard dialog, specify the data you wish to back up. By default, Timeshift excludes the user's home directories from the backup, but you can elect to include them. In addition, you can include just hidden files or all files in the backup.
In the program window, you can quickly access the most important functions via a buttonbar. The main segment of the window lists the existing snapshots, and a status bar at the bottom of the screen shows the number of snapshots and the space available on the target media. Use the Create button to create the first snapshot manually. Timeshift backs up the entire system, including the manually added home directories. In a separate window, the application displays the backup progress in real time.
Timeshift creates the snapshots in a directory of the same name on the target disk; the snapshots are stored in different folders depending on the cron job configuration.
To restore data, first select the desired snapshot from the list and then press Restore. A dialog opens, where you can select the devices and paths to restore. The routine restores the entire system. User directories not included in the backup are kept. You can specify directories on all mounted disks as targets (Figure 10). Make sure you have enough free storage capacity.
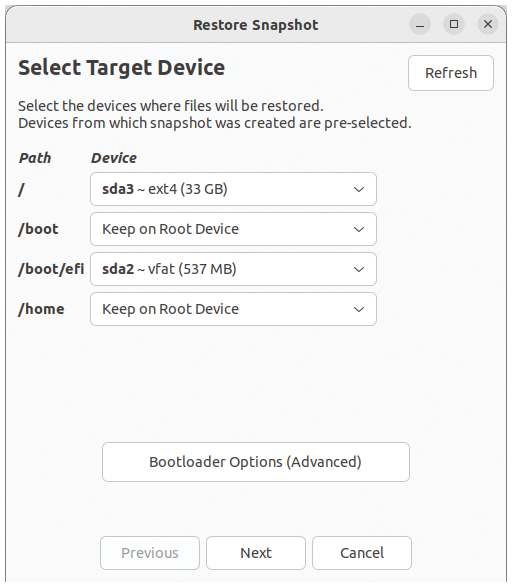 Figure 10: Timeshift also lets you select variable target directories for the restore.
In the next step, Timeshift first performs a dry run. Then the program displays all the pending actions for restoring, allowing you to confirm. After confirming the prompt, Timeshift switches to text mode and backs up the data. The backup is followed by an automatic reboot of the computer.
Vorta
Vorta [7] acts as a graphical front end for the BorgBackup [8] command-line program (see the article on BorgBackup elsewhere in this issue). The cross-platform application is available in the repositories of many Linux distributions. You can also pick up the source code from the project website, and there is a Flatpak on Flathub.
Vorta starts up with a very simple and well-organized program window. When you get there, you can complete the configuration of the tool in several tabs, defining different profiles for different backup tasks. You can add a new profile, in addition to the current Default profile, by pressing the button with the plus sign next to the profile selection field. The new profile is then displayed, allowing you to configure the settings (Figure 11).
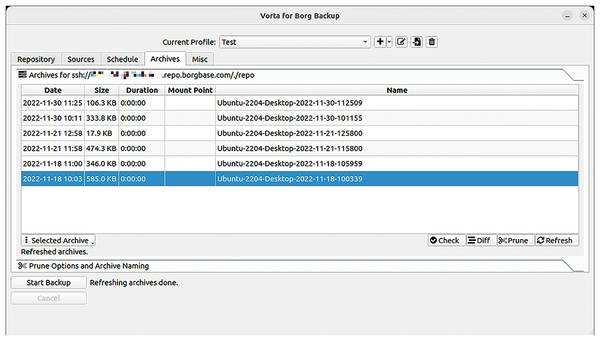 Figure 11: In Vorta, you first need to create a profile in the wizard.
In the Repository tab, first specify the archive where Vorta will store the backups. You can also use online storage. Then specify the access method for the selected repository; data transfer always takes place via a secure SSH connection. You can also define a compression method in this dialog to reduce the transfer volume. You have a choice of several compression methods, or you can save the data without compression. In the Sources tab, specify the datasets you want the tool to back up. You can include or exclude files and directories. Wildcards are supported.
The Schedule tab lets you schedule backups, which means that you can create automatic backups at specified times. You can also specify a period of time during which Vorta will validate the existing repository. This validation prevents the data from accidentally ending up in a corrupt archive and being unrecoverable.
The Archive and Misc tabs grant access to some general settings but do not initially require any input or modifications. After completing the configuration, make an initial backup by clicking Start Backup in the program window. In the Repository tab, Vorta displays various statistics during the backup. After the backup is complete, you can see the original and compressed size of the backup set. If necessary, verify the saved data in the Archives tab by selecting the archive in the list view and then clicking the Check button. The tool checks the archive and displays the results (Figure 12).
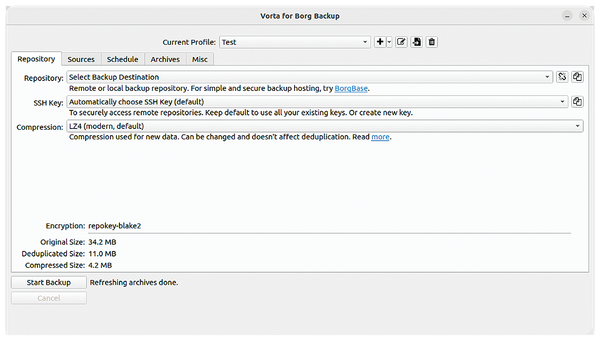 Figure 12: Vorta can also check the integrity of file archives on demand.
Vorta does not create a full backup each time a profile is used but instead only saves the differences from the original in the subsequent backups. To find the differences between individual backups, select the desired backups in the archive list and then click the Diff button. The application will show you the root directories where it has detected differences. Clicking on the plus symbol expands the directory tree, with the differing files appearing in green.
To keep the list of existing archives from getting out of hand, you can thin them out. Click the Prune Options and Archive Naming button at the bottom of the Archives tab. In the settings dialog, specify the number of archives you want to keep by defining the number for various age categories. The selectable intervals range from hourly archives to yearly backups. In addition, you can change the naming conventions if necessary.
During the install, Vorta creates a small disk icon in the system tray on the desktop. Left-click on the icon to open the application window; right-click to close the app. Also in the context menu, you can select a profile or create a manual backup.
To access the backed up data, mount the archives like conventional drives on your Linux system. To mount the archive, select it in the Archives tab, and then click the small triangle to the right of the Selected Archive button. In the context menu, click on the Mount option and specify the mount path.
To restore an archive, click Extract in the same context menu. Vorta will prompt you for the components of the archive. You can define the path for unpacking the archive or the selected components in a small file manager. After you click Choose, the software unpacks the archive or its selected components in the target directory.
« Previous 1 2 3 Next »
Buy this article as PDF
(incl. VAT)
Buy Linux Magazine
US / Canada
UK / Australia
Subscribe to our Linux Newsletters
Find Linux and Open Source Jobs
Subscribe to our ADMIN Newsletters
Support Our Work
Linux Magazine content is made possible with support from readers like you. Please consider contributing when you’ve found an article to be beneficial.

News
-
So Long Neofetch and Thanks for the Info
Today is a day that every Linux user who enjoys bragging about their system(s) will mourn, as Neofetch has come to an end.
-
Ubuntu 24.04 Comes with a “Flaw"
If you're thinking you might want to upgrade from your current Ubuntu release to the latest, there's something you might want to consider before doing so.
-
Canonical Releases Ubuntu 24.04
After a brief pause because of the XZ vulnerability, Ubuntu 24.04 is now available for install.
-
Linux Servers Targeted by Akira Ransomware
A group of bad actors who have already extorted $42 million have their sights set on the Linux platform.
-
TUXEDO Computers Unveils Linux Laptop Featuring AMD Ryzen CPU
This latest release is the first laptop to include the new CPU from Ryzen and Linux preinstalled.
-
XZ Gets the All-Clear
The back door xz vulnerability has been officially reverted for Fedora 40 and versions 38 and 39 were never affected.
-
Canonical Collaborates with Qualcomm on New Venture
This new joint effort is geared toward bringing Ubuntu and Ubuntu Core to Qualcomm-powered devices.
-
Kodi 21.0 Open-Source Entertainment Hub Released
After a year of development, the award-winning Kodi cross-platform, media center software is now available with many new additions and improvements.
-
Linux Usage Increases in Two Key Areas
If market share is your thing, you'll be happy to know that Linux is on the rise in two areas that, if they keep climbing, could have serious meaning for Linux's future.
-
Vulnerability Discovered in xz Libraries
An urgent alert for Fedora 40 has been posted and users should pay attention.