
Using BlinkStick with Raspberry Pi

Productivity Sauce
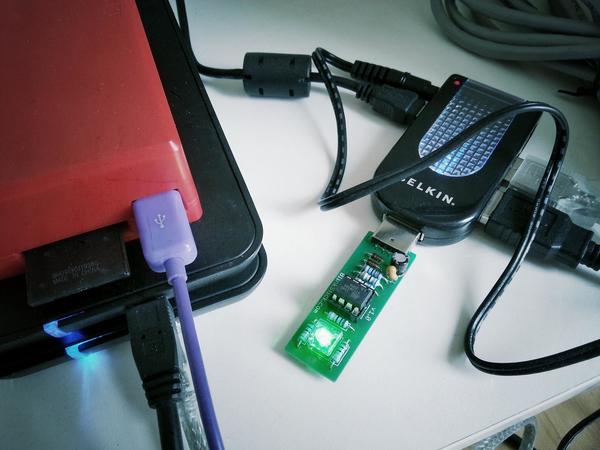
Hooking up LEDs to Raspberry Pi's GPIO pins and controlling them using Python scripts is a great and fun way to learn the ropes. For more advanced projects, you might want to consider investing in BlinkStick, an open source USB LED kit that works with Raspberry Pi, or any other machine for that matter. BlinkStick plugs directly into a USB port, which eliminates the need for a breadboard and wires and makes the setup more tidy. The accompanying software can control multiple BlinkSticks, which you can hook up to a USB hub. More importantly, BlinkStick supports a long list of options, and you can put it to a variety of practical and not-so-practical-but-fun uses.
To get started with BlinkStick on Raspberry Pi, you need to install the BlinkStick Python interface first. To do this, run the following commands:
sudo apt-get install python-dev python-pip
sudo easy_install pip
sudo pip install blinkstick
Run then the sudo blinkstick -h command. If everything works properly, you should see a list of all available options. By default, you have to execute blinkstick commands with root permissions. To fix that, run the following command and reboot Raspberry Pi:
sudo blinkstick --add-udev-rule
So what can you actually do with BlinkStick? For starters, you can use it to visualize CPU usage, and the blickstick command has a dedicated option for that. Run the blinkstick --cpu-usage command, and BlinkStick will change its color depending on the CPU usage (Green = 0%, Amber = 50%, Red = 100%).
Of course, you can put BlinkStick to other uses, too. I'm using BlinkStick with Pygmyfoto running on my Raspberry Pi. Every time someone visits the gallery, BlinkStick blinks with random color. This solution consists of a simple Bash shell script which controls BlinkStick and logs visitor access to the blinkstick.log file:
#!/bin/bash
blinkstick --set-color random --blink --repeats 3
blinkstick --set-color random
DATE=$(date "+%F %T")
echo "Yay! Someone visited your site on" $DATE >> blinkstick.log
The shell_exec ( './blinkstick.sh > /dev/null 2>/dev/null &' ) command embedded into the index.php page triggers the script.
For further info on using BlinkStick and more ideas on how to use this nifty kit, visit the project's GitHub repository. In the meantime, drop by dmpop.dyndns.org/pygmyfoto/ and blink to me. :-)
comments powered by DisqusSubscribe to our Linux Newsletters
Find Linux and Open Source Jobs
Subscribe to our ADMIN Newsletters
Support Our Work
Linux Magazine content is made possible with support from readers like you. Please consider contributing when you’ve found an article to be beneficial.

News
-
California May Exempt Linux from Its Age-Verification Law
After backlash from the Linux community, California may be backing off on its promise to force all operating systems to verify age, but one platform may still have to comply.
-
Another Logic Bug Found in Linux Kernel
Qualys has discovered a vulnerability in the Linux kernel that can be used to elevate standard user privileges.
-
Ubuntu Core 26 Offers Game-Changing Enterprise Features
Ubuntu Core 26 could be a game-changer for organizations looking for increased security and reliability.
-
AI Flooding the Linux Kernel Security Mailing List
AI is giving Linus Torvalds a headache, but not in the way you might think.
-
Top Priorities for Open Source Pros Seeking a New Job
Professional fulfillment tops the list, according to LPI report.
-
Container-Based Fedora Hummingbird Designed for Agent-First Builders
Fedora Hummingbird brings the same approach to the host OS as it does to containers to level up security.
-
Linux kernel Developers Considering a Kill Switch
With the rise of Linux vulnerabilities, the kernel developers are now considering adding a component that could help temporarily mitigate against them… in the form of a kill switch.
-
Fedora 44 Now Gaming Ready
The latest version of Fedora has been released with gaming support.
-
Manjaro 26.1 Preview Unveils New Features
The latest Manjaro 26.1 preview has been released with new desktop versions, a new kernel, and more.
-
Microsoft Issues Warning About Linux Vulnerability
The company behind Windows has released information about a flaw that affects millions of Linux systems.