Create cartoons and anime with OpenToonz

Toon Time
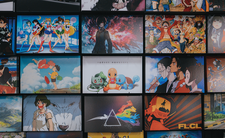
© Photo by Dex Ezekiel on Unsplash

© Photo by Dex Ezekiel on Unsplash

Article from Issue 258/2022
Author(s):

OpenToonz is a professional animation tool for comic and manga artists.

Many readers associate the terms "manga" and "anime" respectively with Japanese comics and animated series, such as Dragon Ball or Pokemon, but today, manga and anime are global phenomena, and artists all over the world devote their attention and effort to the forms.

If you want to experiment with animation yourself, there is no need to stick to pen and paper. OpenToonz [1] is an open source tool that meets the highest animation standards. The program was partly developed in cooperation with famous animation companies such as Studio Ghibli [2], the creative minds behind classic anime films such as Princess Mononoke, Chihiro's Spirited Away, and How the Wind Rises.

OpenToonz is available in the package sources of most popular Linux distributions, so installing should be easy. To test the software with a sample scene, download the sample animation as a ZIP archive from the project page [3] (OpenToonz_sample.zip). You can view this sample on YouTube without installing OpenToonz [4]. Figure 1 shows OpenToonz with the official sample, which stars a dog named Dwanko.

Figure 1: The example animation provided for OpenToonz demonstrates the most important features.

Basic Terms

The classic animation workflow starts with a script and the design of the acting characters. The storyboard is then created from the script. The storyboard contains at least one drawing for each shot that shows the camera position, the movement of the characters, and the type of background. There is also an exposure sheet, called an X-sheet or dope sheet for short. The X-sheet is a frame-by-frame script for each individual shot. You can see an example in the upper right area of Figure 1.

Animators often avoid the need for intermediate drawings by combining smart framing with camera motion over still images. In dialog scenes, for instance, the graphic artist only needs to animate the mouth movement. Drawings are divided into different layers: These individual layers are visible as columns in the X-Sheet.

Although OpenToonz is a 2D animation tool, you don't have to sacrifice a three-dimensional feel. Using motion parallax, you can easily add depth to animations. The parallax effect occurs when objects in the foreground move faster than objects in the background. Figure 2 and Figure 3 illustrate this effect by showing the first and last frames of the animation sequence in the OpenToonz 3D view.

Figure 2: The starting point of the animation: Moving the backgrounds at different speeds creates a parallax effect.
Figure 3: End point of the animation: Animating the dog enhances the motion effect.

Normally, at least three planes are used to create this 3D effect: a cloud plane at the back, one or more vegetation plane(s) in the middle, and a ground plane at the front. In Figure 3, however, in the area of the vegetation plane(s), there is also the plane with Dwanko the dog walking on his hind legs and a projected shadow moving slightly back and forth, which reinforces the spatial impression.

As Figure 4 shows, using only six different drawings can define Dwanko's motion. Each drawing is maintained for three frames before the next pose follows. This process runs in a loop. The illusion of a running dog is also created by the moving floor plane. It is also possible to change the Z coordinates for the individual planes and for the camera, thus adding to the motion effect.

Figure 4: Just six poses are all it takes to make Dwanko run through the landscape.

Desktop

OpenToonz is divided into rooms, also known as workspaces. Each room contains a different collection of windows, which the program displays at special positions on the screen. A list of the rooms appears at the far right edge of the main window, below the menu bar. Some predefined rooms include the Drawing, Palette, Animation, Xsheet, and Browser rooms. You can also define your own rooms that combine the windows you need for a specific task. Almost all rooms contain the viewer window with the flipbook bar below it, playback and frame rate controls, a toolbox with drawing elements, and an X-Sheet window.

Another important window is the Function Editor, which is shown in Figure 1, bottom left. You can use the Function Editor to relate objects and effect transformations to key values and matching interpolations using a table or a graphical editor. The left side of the Function Editor shows a table of transformation values. On the right is the interpolation of the current transformation segment, along with a hierarchical representation of the available objects and effects.

The values defined in the keyframes are highlighted in yellow. Between them are the values calculated by reference to the interpolation method. Each column represents a single animation-capable parameter, and each row shows the value of the parameter for each frame. Empty cells represent constant values without change in the absence of corresponding keyframe definitions.

The Stage folder contains subfolders for the defined cameras, the table, the pegbars, and the layers used. A pegbar is a kind of ruler that groups several superimposed layers and ensures that they are transmuted together.

The FX folder contains subfolders for each effect. Each folder contains transformation parameters associated with the keys. The object and effect tree uses different icons to indicate whether the object or effect is animated and which parameter changes. An icon with an arrow indicates an animated object or effect. A closed folder indicates a non-animated object or effect. An icon with a dotted straight line symbolizes non-animated parameters, and an icon with a continuous curve indicates animated parameters.

You can save the transformation data and load it as a CURVE file, which means it can be exported to other scenes. You also have the option to export the data in the form of a DAT file for use in other programs.

Animations

Other important windows are the X-Sheet and Level Strip windows, shown in Figure 5. The X-Sheet, which lets you control the timing of all elements in a scene, is organized in the form of a table. Each column contains a level of animation and each row represents the set of all levels that will be displayed in the frame. Each cell represents the contents of the column in a specific frame.

Figure 5: The X-Sheet controls the timing of all elements in a scene.

You can load a wide variety of things into the scene, including animation levels, background images and overlays, and video clips. The viewer lets you view and check the contents. You can play back the animation and modify scene content as needed.

Because complex animations are not created by moving individual objects and layers in the Function Editor alone, you will also find the Level Strip window, which you can see on the far right in Figure 5. Images that you select in the Level Strip appear in the viewer window. Clicking on a row in the X-Sheet brings up the frame in the viewer window and updates the display of the Playback and Frame Rate controls in the Flipbook bar. In the column header of the X-Sheet window, you can hide individual levels and control their opacity via color filters.

In Figure 1, you can see the Stage Schematic window bottom right. The stage schematic contains nodes for all the objects used in the scene, letting you change the way the objects are connected. The schematic also shows the camera and lets you define more cameras.

Buy this article as PDF

Express-Checkout as PDF
Price $2.95
(incl. VAT)

Buy Linux Magazine

SINGLE ISSUES
 
SUBSCRIPTIONS
 
TABLET & SMARTPHONE APPS
Get it on Google Play

US / Canada

Get it on Google Play

UK / Australia

Related content

  • FOSSPicks

    Graham looks at OpenToonz, Qtile, SageMath, starcli, Fermentrack, Mindustry, and much more.

  • FOSSPicks

    Graham Morrison tears himself away from updating Arch Linux to search for the best new free software.

  • Krita 3.0

    Krita, a free sketching and painting program, has new features and improvements in version 3.0.

  • Gaming for Godot

    Creating a game requires a wide set of skills to combine graphics, animations, sound, double-clicks, and meticulous coding. The free and open source Godot game engine provides you with all the tools you need to get started.

  • Linux Flash Options

    Flash is today’s tool of choice for animated, interactive web content. But Flash and Linux are worlds colliding. We'll show you the current crop of Open Source Flash authoring solutions.

comments powered by Disqus
Subscribe to our Linux Newsletters
Find Linux and Open Source Jobs
Subscribe to our ADMIN Newsletters

Support Our Work

Linux Magazine content is made possible with support from readers like you. Please consider contributing when you’ve found an article to be beneficial.

Learn More

News