
Keep access data secure with Cryptonify
Master Key

Keep track of your login information for web services with Cryptonify.
Mail providers, social networks, online retailers, auction sites, banks, forums, cloud services and many other services on the Internet want to make life easier for registered users – and usually require authentication with a username and password. The more of these services you use, however, the greater the danger of forgetting or mixing up usernames and passwords. The worst-case scenario is not being able to access your Inbox or data stored on the cloud; unlocking these services costs time and effort. Here the Cryptonify program [1] steps into the breach to keep your access data secure.
As a Java application, Cryptonify requires a corresponding run-time environment, either the one from the GNU project or the Oracle original. You can check whether one of the two versions is already installed on your system using the java-version command in a terminal. If entering the command does not bring a version number to light, you should install the OpenJDK version from the repository of your distribution: This way updates are done automatically when needed. Alternatively, you can use the current Oracle run-time environment [2]. This is no longer included in the distributions' repositories because of the license. Thus, you will need to take care of the necessary updates yourself later.
Getting Started
Cryptonify is available for download for Linux [3] as a 12MB ZIP file. After extracting it, you will find a small shell script in the newly created subdirectory. You can use this shell script to start the software. Manually create a corresponding entry to enable the program by mouse click from a menu.
After launching Cryptonify for the first time, you need to make a few basic settings. The software guides you through several pages of dialog, starting with a greeting and ending with enabling the plugins (Figure 1). The most important steps are specifying the path to the file containing the passwords and creating a master password, which the software requests every time from now on.
 Figure 1: The master password allows you to start Cryptonify and protects the stored data.
The dialog for the master password indicates the strength of the selected password in a color-coded bar. This helps avoid weak character strings. If you want to change the master password later, select the Change master password item from the Settings menu in the program window and then enter the new access data.
After you have defined the basic settings, the software opens the program window, where you can define categories in a separate area on the left; you can enter the websites belonging to the individual categories with the appropriate data in the larger area on the right.
Configuration
Before creating categories and entries, you should first take a look at the extensive configuration menus where you can customize the software to suit your personal needs. You can access these dialogs via Settings | Properties in the main window. Call up the options via seven horizontal tabs in the window that opens (Figure 2). You can set the localization for the interface in the General tab, and you can also modify the path to the file with the passwords. Furthermore, you can activate the portable installation, which allows use of the application on removable disks.
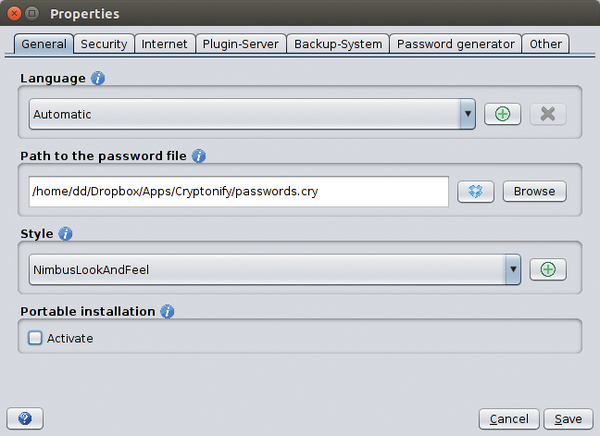 Figure 2: Tailor Cryptonify to your needs before you begin collecting access data.
In the second tab, Security, you can specify the period after which passwords expire and which rules apply for locking the application. Passwords that expire regularly increase security, particularly for online services because, in this way, unauthorized persons cannot permanently acquire data. However, you then also need to change the credentials on the respective websites, which can be rather time-consuming. The mechanism for locking the application makes it possible to lock the interface after a certain period of inactivity and thus deny access to the data by prying eyes. In the Internet tab, you can configure automatic updates and activate the downloading of icons used to identify password data.
In the Plugin-Server tab, you will find entries to various browser plugins; Cryptonify supports Firefox and Chrome in Linux. The software passes on the data for authentication on set websites to Firefox and Chrome – this enables automatic login. You can enable the corresponding extension by clicking the applicable browser icon in this window. The web browser then opens the traditional integration dialog for add-ons and restarts after the Cryptonify plugin has been successfully installed. There should now be a key icon in a green circle in the browser; this interacts with the Cryptonify plugin server.
A few particularly important settings are found under Backup-System (Figure 3): Here you can, for example, define backup intervals for the password file. This file, with the extension .cry, includes all the access data you have defined in encrypted form. The 256-bit strong AES encryption is used here, whereby Cryptonify generates the key using the master password with a PBE algorithm. If the password file is lost and there is no backup, you will have to enter all the authentication data into the program again manually. You should definitely enable the automatic backing up option in the Backup-System settings dialog, where you can select convenient setting options, to avoid this tedious and time-consuming procedure.
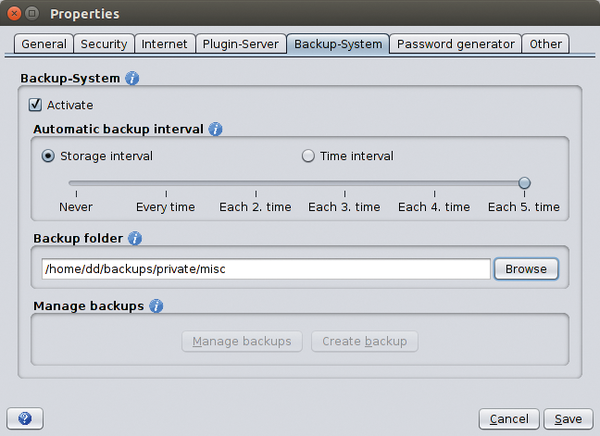 Figure 3: You should instruct Cryptonify to back up its password file automatically and regularly.
The program allows settings for automatically creating passwords in the Password generator tab. The last tab, Other, allows you to customize various options for the appearance. This way you can, for example, color the individual lines in the list view separately, which significantly increases clarity, particularly with vast numbers of categories. To this end, click the Colors tab on the left side of the window and select the desired color for the odd or even rows. Finally, click Save to save your modifications.
Styling
In Linux, Java applications do not exactly stand out with an impressive appearance. However, with Cryptonify, you do not need to come to terms with a rustic look: You are allowed to change the program's theme in the Style field in the General tab. A selection window lists four interfaces integrated into the software. Additional themes can be downloaded from the Internet and integrated into Cryptonify. To this end, search for the term "java look and feel" in an Internet search engine.
The Look And Feel term denotes ready-made graphical components that define the appearance of an application. These themes are usually available as a Java archive (JAR file). Download the eligible JAR files into a directory of your choice and then click the green plus icon in the Cryptonify settings window on the right in the selection box for the styles.
Then, navigate to the subdirectory containing the JAR file in the file manager that opens and select the file. The new theme is now integrated in Cryptonify, and you can enable it in the selection box. Next, click Save and restart the software when prompted. Cryptonify now sports the new appearance (Figure 4).
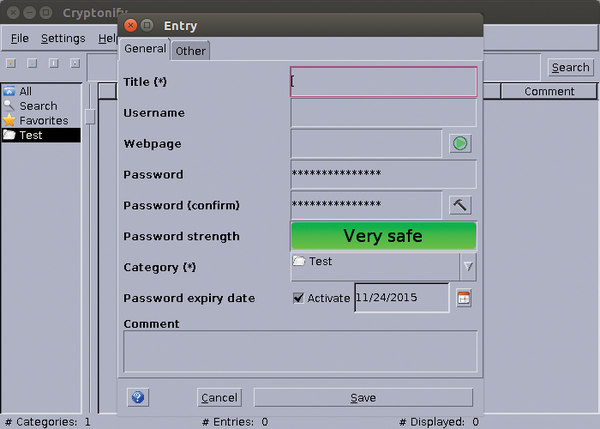 Figure 4: Cryptonify can also change its appearance.
Buy this article as PDF
(incl. VAT)
Buy Linux Magazine
US / Canada
UK / Australia
Subscribe to our Linux Newsletters
Find Linux and Open Source Jobs
Subscribe to our ADMIN Newsletters
Support Our Work
Linux Magazine content is made possible with support from readers like you. Please consider contributing when you’ve found an article to be beneficial.

News
-
Gnome OS Adopting systemd-sysupdate
Gnome OS is about to undergo a major under-the-hood change that promises enhanced security.
-
Endless OS 6 has Arrived
After more than a year since the last update, the latest release of Endless OS is now available for general usage.
-
Fedora Asahi 40 Remix Available for Macs with Apple Silicon
If you've been anticipating KDE's Plasma 6 for your Apple Silicon-powered Mac, then you're in luck.
-
Red Hat Adds New Deployment Option for Enterprise Linux Platforms
Red Hat has re-imagined enterprise Linux for an AI future with Image Mode.
-
OSJH and LPI Release 2024 Open Source Pros Job Survey Results
See what open source professionals look for in a new role.
-
Proton 9.0-1 Released to Improve Gaming with Steam
The latest release of Proton 9 adds several improvements and fixes an issue that has been problematic for Linux users.
-
So Long Neofetch and Thanks for the Info
Today is a day that every Linux user who enjoys bragging about their system(s) will mourn, as Neofetch has come to an end.
-
Ubuntu 24.04 Comes with a “Flaw"
If you're thinking you might want to upgrade from your current Ubuntu release to the latest, there's something you might want to consider before doing so.
-
Canonical Releases Ubuntu 24.04
After a brief pause because of the XZ vulnerability, Ubuntu 24.04 is now available for install.
-
Linux Servers Targeted by Akira Ransomware
A group of bad actors who have already extorted $42 million have their sights set on the Linux platform.