
Document management for the small office
Installation
Paperwork has no built-in installation routine and requires a large number of additional packages. Depending on the Linux distribution, this will sometimes mean expending quite a bit of effort before Paperwork is ready to go. Although the developers provide brief installation instructions for several Linux derivatives on GitHub, they are, however, partly obsolete and therefore not necessarily meaningful. On a freshly installed Ubuntu 16.04, I talked the software into running in a process that involved several steps (see the "Installing Paperwork" box).
Installing Paperwork
First, you need to install various Python packages on the system:
sudo apt install python3-pip python3-setuptools python3-dev python3-pil libenchant-dev
Then, retrieve Paperwork and store it on your mass storage medium using the Pip package manager for Python modules:
sudo pip3 install paperwork
Next, use the Paperwork shell to check whether the program can satisfy all its dependencies. The following commands will help you with this:
paperwork-shell chkdeps paperwork_backend
paperwork-shell chkdeps paperwork
Meet any dependencies still unresolved and, depending on your desktop environment, create a starter for Paperwork in the menu system.
If you are missing a starter for the software at the end of the installation, you can launch the program from a terminal by typing paperwork. This quickly loads a two-panel window. Scanned documents and documents loaded from your data repository appear on the right, whereas any document-specific attributes, such tags, will appear on the left. First, you will want to call the settings dialog with your scanner switched on, even if this only offers you a few basic options (Figure 8), particularly with respect to the resolution of the scanner.
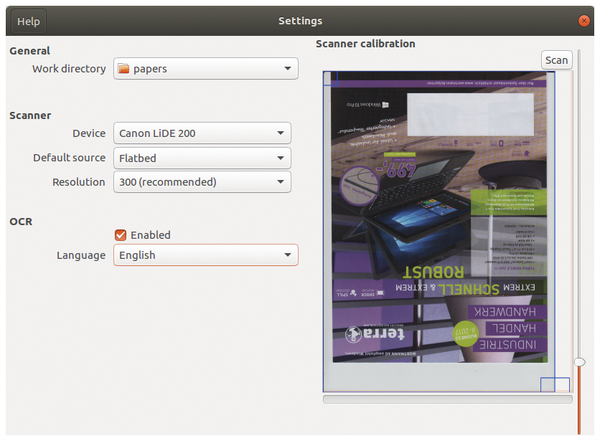 Figure 8: You tweak the Paperwork settings for the scanner in a fairly spartan window.
If your pool of original documents includes many documents with very small fonts, it is advisable to increase the default value to 300dpi. Under certain circumstances, users might want to change the language selection for Tesseract OCR in the selection box.
Usability
Paperwork allows for highly flexible use of documents: When scanning, it will grab a complete stack of originals if you have an automatic document feeder. To do this, press the Scan button in the upper right-hand corner of the program window. Paperwork then shows each page in an animation in the window's right pane. In the background, Tesseract is already performing optical character recognition – if you enabled this previously.
The left pane displays thumbnail images of the first page. The papers subdirectory, which the software creates in the user's home directory, is used to store the text files; multiple-page documents are stored in a single subdirectory. The text files have a .words suffix and can be processed as raw files in any standard editor. But they are primarily used for indexing with keywords.
Paperwork also first runs the OCR program when importing existing files. Note that the software does not support any formats from third-party applications, such as office suites. The exception is the widespread and universal PDF format. If you integrate magazines that are available in this format into the system, the OCR software examines them page by page. Then, Paperwork shows the scaled-down individual pages in a list view in the right windowpane, and the user can magnify these on request.
For print media, which often contains many illustrations and advertisements, it is advisable to turn off predictive text in the Setup menu before the OCR step, which not only saves a significant amount of time, it also avoids unusable results, such as those often encountered if the originals use different colors and font sizes.
Indexing and Searching
Once all of your originals have been scanned or loaded, users can assign keywords. To do so, click on the scaled-down document in the program window's left pane and then press the small icon in the right pane. After clicking on the + button, you can define different labels, or keywords. For a better overview, you can assign colors to the labels (Figure 9).
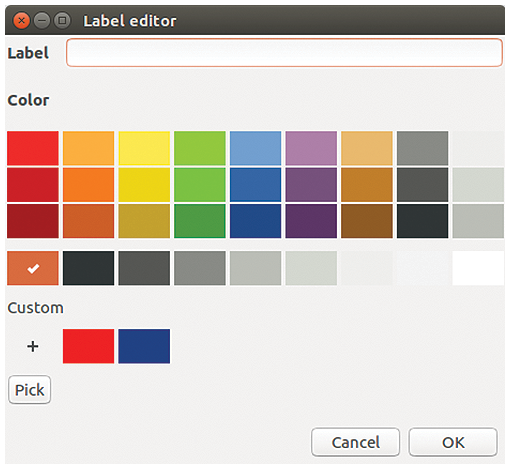 Figure 9: Manual, but colorful – keywording in Paperwork.
Paperwork always assigns all existing reference terms to documents that you are keywording. To disable the incorrect tags in your document, uncheck and simultaneously enter new ones using the Additional keywords input field. After making all specifications, reopen the list display by pressing the back arrow in the Properties view. You should now see color indexing for each document.
To find specific data in extensive documents, click on the Advanced search button top left in the document and then enter your criteria in a very simple search dialog. You can combine the groups Date, Keyword, and Keyword(s) as needed. Clicking on Apply updates the display and lists only the hits that match all search criteria (Figure 10).
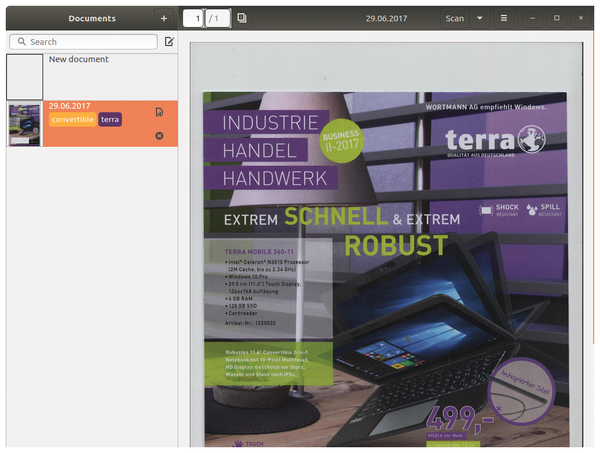 Figure 10: Referenced documents appear with color-coded keywords in Paperwork .
An export function is available from the menu button at the top right. You can export the current documents or pages to PNG, JPEG, or PDF files and store them in a directory of your choice. You can also print the current document using the corresponding entry in the same menu.
Buy this article as PDF
(incl. VAT)
Buy Linux Magazine
US / Canada
UK / Australia
Subscribe to our Linux Newsletters
Find Linux and Open Source Jobs
Subscribe to our ADMIN Newsletters
Support Our Work
Linux Magazine content is made possible with support from readers like you. Please consider contributing when you’ve found an article to be beneficial.

News
-
Canonical Releases Ubuntu 24.04
After a brief pause because of the XZ vulnerability, Ubuntu 24.04 is now available for install.
-
Linux Servers Targeted by Akira Ransomware
A group of bad actors who have already extorted $42 million have their sights set on the Linux platform.
-
TUXEDO Computers Unveils Linux Laptop Featuring AMD Ryzen CPU
This latest release is the first laptop to include the new CPU from Ryzen and Linux preinstalled.
-
XZ Gets the All-Clear
The back door xz vulnerability has been officially reverted for Fedora 40 and versions 38 and 39 were never affected.
-
Canonical Collaborates with Qualcomm on New Venture
This new joint effort is geared toward bringing Ubuntu and Ubuntu Core to Qualcomm-powered devices.
-
Kodi 21.0 Open-Source Entertainment Hub Released
After a year of development, the award-winning Kodi cross-platform, media center software is now available with many new additions and improvements.
-
Linux Usage Increases in Two Key Areas
If market share is your thing, you'll be happy to know that Linux is on the rise in two areas that, if they keep climbing, could have serious meaning for Linux's future.
-
Vulnerability Discovered in xz Libraries
An urgent alert for Fedora 40 has been posted and users should pay attention.
-
Canonical Bumps LTS Support to 12 years
If you're worried that your Ubuntu LTS release won't be supported long enough to last, Canonical has a surprise for you in the form of 12 years of security coverage.
-
Fedora 40 Beta Released Soon
With the official release of Fedora 40 coming in April, it's almost time to download the beta and see what's new.