Reinventing the keyboard

Open Hardware – Keyboardio
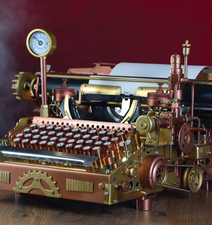
© Lead Image © 3355m, 123RF.com

© Lead Image © 3355m, 123RF.com

Article from Issue 210/2018
Author(s):

The Keyboardio Model 01 is a highly-customizable open hardware keyboard.

For a while, the Keyboardio [1] Model 01 seemed destined to never ship. Although its 2015 crowdfunding campaign raised over five times its goal of $120,000, production was repeatedly thwarted by problems with manufacturers and quality control – all of which is recorded in painstaking detail on the company blog [2], and which should become required reading for any would-be hardware vendor. Yet despite everything, in November 2017, the Model 01 keyboard finally began shipping. Although shipping is still seriously backlogged, the Model 01 (Figure 1) turns out to be worth waiting for, both as a high-end ergonomic keyboard and as one of the most customizable pieces of open hardware ever produced.

Figure 1: The Model 01 straight out of the box.

The Model 01 is a mechanical keyboard built with Matias keyswitches [3] that are not only longer-lasting and easier to repair than the usual cheap membrane keyboards, but require less pressure to activate than standard keyswitches. The minimalist keyboard of 64 keys ships with three layers – that is, key bindings that can be activated while pressing a command key, just as the default lowercase keys produce uppercase letters when the Shift key is pressed. With the Model 01, pressing the Num key activates the number pad and arrow keys, while pressing the Fn key activates the 12 function keys, Delete, and square and curly brackets. The default layers are illustrated on a laminated sheet that ships with the Model 01.

Keys are divided between two slabs of maple hardwood. Each of the keys is individually sculpted and shaped to help guide fingers from one key to the other. To reduce finger movement, rows of character keys are arranged in curving key banks and columns of keys on a straight diagonal, instead of having straight rows and columns staggered to the right, as on a standard keyboard. Command keys are to the left and right of the letter keys, or else arranged in an arc of four at the bottom of the keyboard that are pressed by the thumbs.

Besides the Fn key, the command keys include the replacement for a Windows key, the LED key for toggling through installed backlight settings, the Prog key for flashing the firmware, and the Any key, which originated in the old joke about procedure instructions to "press any key," but became a blank key that can be programmed as desired. The keyboard ships without a Cap lock button, but, since the Shift key is accessed by the thumb, many users can continue to type while holding it down.

The Advantages of Ergonomics

The arrangement and shapes of the Model 01's keys, as well as the choice of keyswitches, are designed to reduce the typing stress. The result is that typing on a Model 01 is a different experience from typing on most keyboards – especially from the cheap membrane keyboards sold in most computer stores. As the Quick Start Guide notes, learning to type at your accustomed speed on a Model 01 can take as long as several weeks (for me, it was about five days). If my own experience is any indication, a new user can expect to start with a typing technique not far removed from hunt and peck, then gain about half their usual speed until they become too tired to remember their new reflexes, and after that to slowly and steadily regain their usual cruising speed.

This process can be trying, but it has the advantage of suggesting how you might customize the keyboard layout to your individual advantage (see below). For example, I find myself constantly overreaching when I type an A or a Z and hitting the PgUp or PgDn keys beyond them. Therefore, I decided to remap the two keys I was hitting by mistake so that they copy and paste instead.

Moreover, contrary to what cynics might assume, in the case of Keyboardio's Model 01, the word "ergonomic" is more than a marketing term (often used the way that "organic" or "gluten-free" might be used in the supermarket). My own experience is that, after a few days of stiffness as finger muscles are used in unfamiliar ways, the twinges and disablements of repetitive stress injuries are reduced to short-lived ghosts of their former selves.

This ergonomic advantage is no doubt due to the fact that the Model 01 began as a highly personal project of Keyboardio's technical partner Jesse Vincent. Those who regularly spend over eight hours a day at a keyboard can especially appreciate the advantages. Although it almost seems beside the point, the arrangement of keys on an arc and their mounting on maple also makes the Model 01 the most stylish keyboard since those produced by custom keyboard maker Datamancer [4] – although after the industry-standard ugliness, the aesthetics are a welcome change.

Hardware Customizations

When ordering a Model 01, you can choose one programmed by default for the standard QWERTY layout, or alternative layouts such as Dvorak, Colemak, Malt, or Workman. You also have the choice of keycaps – including Runic or blank – and can buy extra sets as well. In addition, you have the choice of the default quiet keyswitches or the loud keyswitches that some typists prefer for their audio feedback.

Once your order arrives, you can experiment with several different layouts. A Model 01 is split into two halves (Figure 2). Each half contains a ATmega32u4 Arduino microcontroller and is connected to the other by an RJ45 cable – a short one for those who want to place the halves close together, or a longer one for users who prefer to separate them. The halves can be joined by a center bar or kept separate so that they can be positioned individually on a flat surface.

Figure 2: Depending on the connecting cable, the Model 01 halves can placed together or widely separated.

Still another option is to place the two halves flat or to mount each on its own stand at a variety of angles (Figure 3). For ergonomic purposes, the most efficient arrangement is to tent each half, so that the inner edge is higher than the outer (Figure 4). If the centerplate is also used, the stands must be screwed into position after the centerplate is added.

Figure 3: The stands and centerplate allow the keyboard to be positioned in several different ways.
Figure 4: The two sides positioned at an angle.

Without any software editing, users can also change the keyboard backlighting by toggling the LED key (Figure 5). A dozen different default options are available, ranging from a half a dozen backlight colors, the lighting up of a pressed key, the blinking on and off of the entire array of keys, or turning all backlights off. If you have never used backlit keys, you may be inclined to dismiss them as frivolous, but they may help to make your typing more accurate by making the keys more visible, especially in dim light. The Model 01 uses low-draw backlights, so using them should have minimal effects on the longevity of the hardware.

Figure 5: Backlights make keys more visible.

Do-it-yourselfers can even open up the keyboard to adjust the microcontrollers. Unlike with other, proprietary, products, user exploration of the hardware does not void the warranty. In fact, to emphasize Keyboardio's dedication to openness, the Model 01 ships with a small multi-headed screwdriver suitable for opening it up.

Keyboard Customization

Unlike Input Club [5], another maker of open source keyboards, Keyboardio does not yet have a graphical interface for customizing keybindings. An interface called Chrysalis [6] is in development, but it is not yet officially released. Nor does the Model 01 ship with any instructions on how to modify Kaleidoscope [7], the Model 01 firmware – apparently on the assumption that those interested will know enough to find the online instructions. However, even if they do, instructions and resources are scattered over several sites.

Customizing the Model 01's behavior means modifying the firmware and reinstalling or flashing the result – the identical requirement for installing updated firmware from Keyboardio. The full set of instructions and their background are too lengthy to give here, but it requires the installation of an Arduino environment and Kaleidoscope on a computer to which the keyboard can be attached [8]. Once this prerequisite is completed, users can modify keymaps, macros, and plugins, either by themselves or by downloading and pasting keymaps created by other users.

The simplest modification is editing the keymapping to change what happens when each individual key is pressed (Figure 6). Keymapping is set in the Model01-Firmware.ino file, which is an example of what Arduino programming calls a Sketch. A keymapping is literally that – a text-based map in which each key is named along with what happens when that key is pressed. The default firmware defines the default layer for a QWERTY key layout and separate layers for the keybindings when the Fn and Num keys are pressed. Users can modify the default layers, enabling unused keys, or adding new ones, such as traditional alternative layouts like Dvorak or Colemak [9]. Other popular modifications include rearranging the command keys such as Space or Esc to preferred positions. Some definitions for keys can be learned from the default file or from the online reference [10].

Figure 6: A default keymapping displayed in the Arduino IDE.

To a certain extent, these changes can be reinforced by repositioning the easily removable keycaps on the Model 01. However, the individually-sculpted keys may limit the repositioning, which is why additional sets of keycaps – especially blank ones – are useful.

Like keymaps, macros can also be added directly to keymap Model01-Firmware.ino. For macros for a specific piece of software, such as Vim, you can add a new layer. Some users have also created new LED effects as plugins, which are accessed via macros. Basic instructions for writing a macro are available online [11], and the existing macros can also be tweaked or commented out. A partial list of existing macros is available online [12]; an especially useful one is MacrosOnTheFly, which can record keystrokes and play them back as macros [13].

More complex modifications can be placed in plugins, which generally require some Arduino programming knowledge. A description of core – that is, official plugins – is available [14], as well as descriptions of unofficial ones [15].

The resources listed above are reasonably complete, but hackers should watch the Keyboardio community site [16] for other examples and instructions. There has been some talk of a central repository and manuals, but, as I write, neither exists.

All these modifications can be written in the Arduino IDE or in a text editor – after, of course, a backup is created for recovering from disastrous results. When the modifications are complete, save the revised Sketch in ~/Arduino/Model01-Firmware. From the same directory, run the command make flash. When the output signals that the command is ready, hold down the Prog key so that the command can bypass the microcontrollers' bootloaders before continuing. The Prog key will flash to show that it is being used. When the command is complete, unplug the keyboard, and plug it in again so that the firmware can restart.

Buy this article as PDF

Express-Checkout as PDF
Price $2.95
(incl. VAT)

Buy Linux Magazine

SINGLE ISSUES
 
SUBSCRIPTIONS
 
TABLET & SMARTPHONE APPS
Get it on Google Play

US / Canada

Get it on Google Play

UK / Australia

Related content

comments powered by Disqus
Subscribe to our Linux Newsletters
Find Linux and Open Source Jobs
Subscribe to our ADMIN Newsletters

Support Our Work

Linux Magazine content is made possible with support from readers like you. Please consider contributing when you’ve found an article to be beneficial.

Learn More

News