
Bookmark organization with floccus and LinkAce
Installation
If you like the idea, you can test the LinkAce demo [12] without any obligations before proceeding to install. There are three options to choose from for setting up on your own system. The easiest way is to use a prepared Docker Compose file that installs all the required components [13]. If you want more control over the process, you can use the Docker image from Docker Hub [14] as an alternative. As a third option, you can install all the components manually on your server [15].
I implemented the Docker Compose method for my test; this is also a good choice for newcomers. I used an Ubuntu Server 22.04 as the basis. To set up Docker and its associated components on your machine, proceed as shown in Listing 1. If you are using a different Ubuntu version, replace the jammy specification from line 5 with the codename of the Ubuntu release you are using.
Listing 1
Setting Up Docker
You can check on https://github.com/docker/compose/releases if version 2.13.0 (line 12) is still the latest. The entries from lines 14 and 15 let you determine the currently installed version.
The further procedure is described in the LinkAce documentation [16]. First of all, you need to choose between the basic and advanced version of LinkAce. The basic version, which delivers the application and the web server in a container, is fine if you only want to use LinkAce locally on your network. For the advanced variant, you need to install the software, web server, and database in separate containers. Among other things, this simplifies the use of a reverse proxy for securing via HTTPS if you want the application to be accessible from the outside.
In terms of the installation procedure, both variants are the same, except that you need to download a different Compose file. I will use the basic method here. The procedure for using a reverse proxy or a load balancer in the extended variant can also be found in the documentation [16].
First, download linkace-docker-simple.zip or linkace-docker-advanced.zip to a previously created folder in your home directory and unzip the ZIP file. The basic variant contains the files docker-compose.yml and the hidden file .env in addition to license information and a README. The extended variant adds the nginx.conf and nginx.ssl.conf files.
Setting Passwords
Before proceeding, you need to at least change the POSTGRES_PASSWORD and REDIS_PASSWORD entries in the .env file. If you use a database other than MySQL, then replace the name there to match. After saving, the docker-compose up -d command is used for the final setup work. The setup can take a few minutes – after all, the call rolls out the application, web server, and database in line with the specifications in the compose file. When done, you will see a URL that lets you launch the LinkAce web interface.
Some more steps to take before using LinkAce, partially optional, are summarized in the Post Setup [17] section of the documentation. I will look at the most important of these. First, switch to Settings in the top right corner. You will see the bookmarklet, which you need to drag into your bookmarks bar. Just below, you have the functions for creating an API token. Create a user including a password and an email address. If you want to add more security with two-factor authentication, you will find instructions for this in the User Settings documentation [18].
You can then set your preferences for the language, time format, privacy, and some preferences for the web interface. At the bottom of the page, you decide whether you prefer Light or Dark Mode, or whether you want to follow your desktop environment's default settings. Last but not least, choose the social media platforms on which you want to share your links, if any.
In addition to the Settings, there are the System Settings, which partly overlap. The first thing to do here is to create a cron token. It is used to periodically check your links, for backups, and for a backup in the Wayback Machine. The procedure for setting up a cron job for LinkAce is shown in the "Cron Job for LinkAce" box (Figure 11).
Cron Job for LinkAce
LinkAce needs a cron job to check the links, add them to the Wayback Machine, and create backups. The easiest way to create one is to use the crontab -e command. Then create a job as in the following:
* * * * * wget -qO- http(s)://linkace-examplecom/cron/WPvv4mxM6nr22Aq4rVf1qEKutsXLTgyw
The part following .../cron/ is created as a cron token in the system settings.
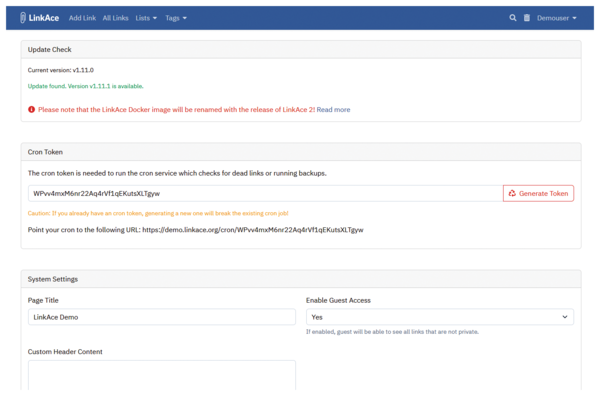 Figure 11: Among other things, you can generate a token in the settings; you need this for time-controlled cron jobs to work correctly.
LinkAce offers more options than standard bookmark management in the web browser when it comes to sorting, searching, and categorizing. You can change individual links from public to private and vice versa at will. A description of any length can be added to each link. Deleted links remain in the Recycle Bin until you empty it. In addition, there are RSS feeds for private and public links [19]. Some commands can be used for administration via a command-line interface (CLI) interface [20]. Upgrades from LinkAce are also easy, as evidenced by the documentation [21].
Conclusions
Floccus and LinkAce both aim to improve the bookmark handling experience, but with different strategies. Floccus provides secure synchronization where the data remains under your own control. LinkAce instead focuses on uncomplicated management of even the largest link collections. The developer is happy to accept suggestions on GitHub for additional features in the upcoming version 2. This is also where you will find the forum for the application [22]. No matter which application you choose, the good thing is that no data ends up in clouds belonging to Google, Mozilla, or other providers. Instead, everything remains under your own control.
Infos
- Firefox Sync: https://www.mozilla.org/en/firefox/sync/
- floccus: https://floccus.org
- LinkAce: https://www.linkace.org
- Bookmark app for Nextcloud: https://github.com/nextcloud/bookmarks
- floccus Guide: https://floccus.org/guides
- floccus FAQ: https://floccus.org/faq
- Self-hosted Firefox sync server: https://mozilla-services.readthedocs.io/en/latest/howtos/run-sync-1.5.html
- Kevin Woblick: https://kovah.de/
- Wayback Machine: https://en.wikipedia.org/wiki/Internet_Archive#Wayback_Machine
- AWS: https://aws.amazon.com
- S3: https://cloud.support.dracoon.com/hc/en/articles/360001402540-ber-S3-Simple-Storage-Service-
- LinkAce demo: https://demo.linkace.org/
- Installation via Docker Compose: https://www.linkace.org/docs/v1/setup/setup-with-docker/
- Installation via Docker Hub: https://hub.docker.com/r/linkace/linkace/
- Installing the server: https://www.linkace.org/docs/v1/setup/setup-without-docker/
- LinkAce setup with Docker: https://www.linkace.org/docs/v1/setup/setup-with-docker/
- LinkAce post-setup steps: https://www.linkace.org/docs/v1/setup/post-setup/
- LinkAce user settings: https://www.linkace.org/docs/v1/configuration/user-settings/
- LinkAce RSS feeds: https://www.linkace.org/docs/v1/application/rss-feeds/
- LinkAce commands via CLI: https://www.linkace.org/docs/v1/cli/
- LinkAce upgrades: https://www.linkace.org/docs/v1/upgrade
- LinkAce forum on GitHub: https://github.com/Kovah/Linkace/discussions?page=3
« Previous 1 2 3
Buy this article as PDF
(incl. VAT)
Buy Linux Magazine
US / Canada
UK / Australia
Subscribe to our Linux Newsletters
Find Linux and Open Source Jobs
Subscribe to our ADMIN Newsletters
Support Our Work
Linux Magazine content is made possible with support from readers like you. Please consider contributing when you’ve found an article to be beneficial.

News
-
Ubuntu 24.04 Comes with a “Flaw"
If you're thinking you might want to upgrade from your current Ubuntu release to the latest, there's something you might want to consider before doing so.
-
Canonical Releases Ubuntu 24.04
After a brief pause because of the XZ vulnerability, Ubuntu 24.04 is now available for install.
-
Linux Servers Targeted by Akira Ransomware
A group of bad actors who have already extorted $42 million have their sights set on the Linux platform.
-
TUXEDO Computers Unveils Linux Laptop Featuring AMD Ryzen CPU
This latest release is the first laptop to include the new CPU from Ryzen and Linux preinstalled.
-
XZ Gets the All-Clear
The back door xz vulnerability has been officially reverted for Fedora 40 and versions 38 and 39 were never affected.
-
Canonical Collaborates with Qualcomm on New Venture
This new joint effort is geared toward bringing Ubuntu and Ubuntu Core to Qualcomm-powered devices.
-
Kodi 21.0 Open-Source Entertainment Hub Released
After a year of development, the award-winning Kodi cross-platform, media center software is now available with many new additions and improvements.
-
Linux Usage Increases in Two Key Areas
If market share is your thing, you'll be happy to know that Linux is on the rise in two areas that, if they keep climbing, could have serious meaning for Linux's future.
-
Vulnerability Discovered in xz Libraries
An urgent alert for Fedora 40 has been posted and users should pay attention.
-
Canonical Bumps LTS Support to 12 years
If you're worried that your Ubuntu LTS release won't be supported long enough to last, Canonical has a surprise for you in the form of 12 years of security coverage.