Visual programming with Alice
Finding Nemo
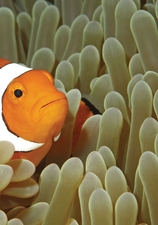
If you can use your desktop environment, then you can also write programs: All you need is your mouse, the Alice IDE, and some time to experiment.
In the Alice development environment, you don't need to type in a single command or learn a cryptic language. Instead, you can create applications and compile all the necessary actions and processes just by clicking your mouse. You start by dragging ready-made items into an empty 3D world. Each item offers several actions that change its appearance, its location, or its behavior. Then, you can just drag and drop the desired actions into a sequence plan, which Alice executes on demand.
Easy-as-pie controls certainly have their limits. For example, the applications created here are always rooted in the 3D world. Alice is therefore suitable mainly for 3D animations or games. The almost mandatory requirement for the 3D world is that Linux supports your video card's 3D acceleration; otherwise, the program you create will run at a snail's pace.
Number Girl
Alice [1] currently exists in two versions. According to the makers, children especially should use the older version 2. Above all, this version teaches logical thinking and the basics of programming. The new version 3, however, focuses on object-oriented programming. It increasingly uses the standard terminology found in this field, thus allowing an easier transition to Java later on.
The basic approach is the same in both versions, with the main difference being the slightly different-looking user interface and slightly different terminology. In this article, I focus on version 3.1, but most of the explanations also apply to Alice 2.3.
The programming environment, developed at Carnegie Mellon University in Pittsburgh, Pennsylvania, USA, is not free software. Although Alice is published under a free license, it is not open source. The installation of the IDE is described in the "Installing Alice" box.
Installing Alice
To download Alice 3.1 for Linux, go to the Alice website [1], look for the Downloads menu and select Get Alice 3.1. In the Universal Installer area, click on Download Alice 3.1 Universal .zip for all platforms. This gives you a zip archive that you can unpack in your home directory. Doing so automatically creates the Alice3
subdirectory.
In the directory, make the alice3.sh
file executable (right-click, select Properties, then click Run as a program or a similarly labeled item in the Permissions tab). If you want to get rid of Alice later, you only need to delete the complete Alice3
directory.
Next, you need to have Java in the form of a Java Development Kit (JDK). The Java runtime environment (JRE) as installed by many distributions is not enough here. On Ubuntu, you can install the JDK quickly in a terminal window with the sudo apt-get install default-jdk
command. You can then launch Alice in the Alice3
directory using the alice3.sh
script.
Setting Up Store
After launching the programming environment, the window shown in Figure 1 pops up. You first need to select the background for your 3D world. In the following example, I want a fish to swim through an underwater world, so I will choose SEA_FLOOR. Clicking OK opens the main window shown in Figure 2. Because the window consumes a lot of space, you will want it to fill your whole screen. The upper left pane is the scene view, the lower left is the methods panel, the large window on the right is the code editor, and the margin on the bottom right holds the control tiles.


For the moment, I'll look at the scene pane, where you will see the currently empty 3D underwater world. Press the Setup scene button to populate it with a fish, or you can or select Window | Perspectives | Setup Scene from the menu. Alice now changes to the view shown in Figure 3, in which the 3D world takes up the largest part of the main window.
In the bottom row, a palette holds all the available items. To help keep track of the objects, Alice sorts them into categories. Flyer Classes, for example, are all objects that can fly – currently only birds. Pressing All Classes returns to the overview. An alternative grouping is available in the Browse Gallery By Theme tab. If you look in ocean, for example, all the objects will be suitable for an underwater scenario. Finally, you can click on the Search Gallery tab to search for a specific object.
For the desired underwater scenario, change to the Browse Gallery By Theme tab and select ocean. Next, hold down the left mouse button on the small yellow clownfish and drag it into the underwater world; however, do not release the mouse button yet. A yellow cube appears in the world (Figure 3). Drag the clownfish to the location you want it to appear.
In the example, I moved it to the left side of the window. You will notice that Alice always locates the object just above the ground – not exactly perfect for a floating fish, but not something you can change at this time. Once you have found a suitable position, release the mouse button. Alice opens the window in Figure 4, which shows that you have created a new object of the type ClownFish in the 3D world. To reuse the object more easily later, you will want to enter a name for the fish in the name box (e.g., Nemo) and then press OK to close the window.

Lift Mechanism
Little Nemo now appears in the underwater world. A green circle indicates that it is currently selected (Figure 5). You can drag and drop to move the fish around freely; clicking on one of the curved arrows at the bottom of the 3D world lets you change the perspective. For this example, however, you can leave the current angle of view.
On the right edge of the window, you will find a palette with all the properties for the object (in Alice 2, they are located in the Properties tab at the bottom left). You can use the Paint drop-down list to specify a different color for Nemo. The Opacity value defines how transparent the fish will be. A value of 1.0 makes Nemo completely visible, and 0.5 makes him semi-visible.
You can use the Vehicle field to chain Nemo to another object. He then automatically follows every movement of the chosen object. Particularly interesting are the values for Nemo's Position and Size. First, you should raise the fish off of the ground somewhat, so that he can swim freely. To do this, enter the value 0.5 under y and press the Enter key. Alice now lifts the fish (Figure 5). Entering a value in x would move Nemo on a horizontal plane, and a z value would move him toward the front or rear. The default size of Nemo is perfect for the example.
Buy this article as PDF
(incl. VAT)
Buy Linux Magazine
Subscribe to our Linux Newsletters
Find Linux and Open Source Jobs
Subscribe to our ADMIN Newsletters
Support Our Work
Linux Magazine content is made possible with support from readers like you. Please consider contributing when you've found an article to be beneficial.
News
-
The GNU Project Celebrates Its 40th Birthday
September 27 marks the 40th anniversary of the GNU Project, and it was celebrated with a hacker meeting in Biel/Bienne, Switzerland.
-
Linux Kernel Reducing Long-Term Support
LTS support for the Linux kernel is about to undergo some serious changes that will have a considerable impact on the future.
-
Fedora 39 Beta Now Available for Testing
For fans and users of Fedora Linux, the first beta of release 39 is now available, which is a minor upgrade but does include GNOME 45.
-
Fedora Linux 40 to Drop X11 for KDE Plasma
When Fedora 40 arrives in 2024, there will be a few big changes coming, especially for the KDE Plasma option.
-
Real-Time Ubuntu Available in AWS Marketplace
Anyone looking for a Linux distribution for real-time processing could do a whole lot worse than Real-Time Ubuntu.
-
KSMBD Finally Reaches a Stable State
For those who've been looking forward to the first release of KSMBD, after two years it's no longer considered experimental.
-
Nitrux 3.0.0 Has Been Released
The latest version of Nitrux brings plenty of innovation and fresh apps to the table.
-
Linux From Scratch 12.0 Now Available
If you're looking to roll your own Linux distribution, the latest version of Linux From Scratch is now available with plenty of updates.
-
Linux Kernel 6.5 Has Been Released
The newest Linux kernel, version 6.5, now includes initial support for two very exciting features.
-
UbuntuDDE 23.04 Now Available
A new version of the UbuntuDDE remix has finally arrived with all the updates from the Deepin desktop and everything that comes with the Ubuntu 23.04 base.