Using XML code in PHP scripts with XHP
Classic
Besides the specified HTML elements, users can also define their own. It saves a huge amount of time if you just need to add a tag like <ingredients/>
, which is swapped automatically by XHP for an HTML list with ingredients. In this way, you can quickly put together a template engine. To use an individual element, you only need to create a new class; however, a couple of conditions apply to the class: It must be derived from the :x:element
parent class, which – among other things – provides the appendChild()
introduced earlier. Also, the class name must use the tag name and start with a colon. Finally, you need to implement the render()
function, which returns XHP objects.
Listing 6 gives an example. The code in Listing 6 creates a new element called ingredients
. The first step is to define a matching :ingredients
class. This teaches XHP the <ingredients />
tag. Once it shows up somewhere in the PHP code, XHP creates the object. (See line 7 of Listing 6.) Once echo
outputs the element, XHP automatically calls the render()
method, which returns a small list. At this point, Listing 6 uses a little trick: The <ul> ... </ul>
list returned by render()
is automatically transformed by XHP into an XHP object. In other words, render()
returns an XHP object, as requested. Returning the string An article
, however, would result in an error.
Listing 6
Class Definition Example
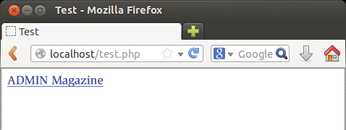
Listing 6 declares the :ingredients
class (Figure 6). Apparently with a view to XML namespaces, XHP classes use a prefix separated by a colon from the actual name. Here, you could select the admin
prefix so that the entire class goes by the name of admin:ingredients
and the tag is thus <admin:ingredients />
. However, this is just a convention; you can leave out the prefix (or namespace) in your own projects.
How Primitive
The render()
method must always return XHP objects. If you only want to return a string, you have to derive your own class from the x:primitive
parent class. However, this class is explicitly designed for "low-level elements," such as the HTML elements a
or h1
that need to output the markup or tags. In contrast to x:element
, classes derived from x:primitive
need to implement the stringify()
method, which in turn returns the string that also ends up in the output later. Listing 7 shows an example of an element named ingredient
. Its stringify()
method simply outputs the <div>flour</div>
string.
Listing 7
Derivatives of :x:primitive
Listing 6 and Listing 7 do not worry about their child elements. In the following case,
echo <admin:ingredient> <div>sugar</div> </admin:ingredient>;
the output would still be flour
, as shown in Figure 7. <div>sugar</div>
is a child element of admin:ingredient
.
A loop is needed in stringify()
to iterate through all the child elements and integrate them into the output (Figure 8). Listing 8 shows the loop: It uses the getChildren()
method to return all the child elements of the object. The code in Listing 8 is available to all classes derived from x:element
.
Listing 8
Evaluating the Child Elements

Characteristics
If an element has attributes, you can list them just as easily as in Listing 9 with the attribute
keyword. In Listing 9, the element admin:auto
receives exactly two attributes. The first is brand
; it accepts strings and defaults to a value of Ferrari
. The attribute name is followed by @require
, stating the attribute is mandatory. Its colleague color
can only assume two possible values: blue
and red
.
Listing 9
Defining Attributes
You can access the attributes using the getAttributes()
method (Figure 9), which can then be output in a loop (see Listing 9) within render()
. getAttributes()
is also available to any class derived from x:primitive
.
« Previous 1 2 3 Next »
Buy this article as PDF
(incl. VAT)
Buy Linux Magazine
Direct Download
Read full article as PDF:
Price $2.95
News
-
The 14" Pinebook Pro Linux Laptop is Shipping
After a considerable delay, the 14" version of the Pinebook Pro laptop is, once again, available for purchase.
-
OpenMandriva Lx ROME Technical Preview Released
OpenMandriva’s rolling release distribution technical preview has been released for testing purposes and adds some of the latest/greatest software into the mix.
-
Linux Mint 21 is Now Available
The latest iteration of Linux Mint, codenamed Vanessa, has been released with a new upgrade tool and other fantastic features.
-
Firefox Adds Long-Anticipated Feature
Firefox 103 has arrived and it now includes a feature users have long awaited…sort of.
-
System76 Refreshes Their Popular Oryx Pro Laptop with a New CPU
The System76 Oryx Pro laptop has been relaunched with a 12th Gen CPU and more powerful graphics options.
-
Elive Has Released a New Beta
The Elive team is proud to announce the latest beta version (3.8.30) of its Enlightenment-centric Linux distribution.
-
Rocky Linux 9 Has Arrived
The latest iteration of Rocky Linux is now available and includes a host of new features and support for new architecture.
-
Slimbook Executive Linux Ultrabook Upgrading Their CPUs
The Spanish-based company, Slimbook, has made available their next generation Slimbook Executive Linux ultrabooks with a 12th Gen Intel Alder Lake CPU.
-
Fedora Linux is Coming to the Raspberry Pi 4
Thanks to significant work in the upstream, the upcoming release of Fedora 37 will introduce support for the Raspberry Pi 4.
-
New Linux Ultrabook from TUXEDO Computers
TUXEDO Computers has released a new 15" Ultrabook running Linux.