A simple storyboard editor
Storyteller
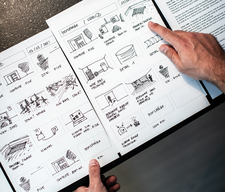
Krita 5 includes an editor that makes it easy to prepare storyboards for any purpose, including unexpected ones.
Krita's new Storyboard Docker helps you prepare storyboards for animations and other multimedia projects [1].
If you want to visually create and narrate a story, a storyboard is an essential tool. Artists use storyboards in film, dance, comic strips, animations, and more. StudioPigeon [2] describes a storyboard as a visual representation of your story's narrative flow, scene by scene, drawn as simply as possible without using colors, backgrounds, character design, soundtracks, or any other details that you add later after the storyboard has been accepted.
A storyboard offers the quickest and easiest way to provide an overview of your story, check if it makes sense, and share it with others. Storyboards are used in creating all but the very simplest visual stories because they minimize the risk of wasting a lot of time – and possibly even money – due to confusion or misunderstanding.
A storyboard is essentially just a progression of images, which means that one could create a storyboard with any slideshow software; however, Krita's storyboard feature offers some benefits over a conventional presentation tool. First of all, a storyboard lets you predefine a "plot" for the story or presentation in a format that you can later develop and even animate. A Krita storyboard is also a good way to learn how to use Krita. You can share a visual description of what you want to achieve and then use that description to seek advice from teammates or Krita experts.
Quick Krita Intro
Krita [3] is an open source, multiplatform painting program used for digital painting, illustration, animation, concept art, and other creative work. A very rich piece of software, Krita provides hundreds of commands and options, including many tools and filters to draw or manipulate both raster and vector images.
Krita places images in layers that can be grouped hierarchically to let users manage and process the images efficiently. Many Krita functions are placed inside panels called dockers that you can detach from the main window and arrange on your desktop as desired. Krita also has workspaces optimized for specific activities (e.g., comics or animations). These workspaces are essentially predefined combinations of dockers that you can quickly load by clicking on the small button in the top right corner of the main window.
You can find Krita in the official repositories of many Linux distributions, but it may not be the current version 5. If you can't find the current version in your distro's repository, you can download the AppImage single-file version, make it executable, and install it somewhere in your $PATH
. To install Krita 5.06 on my Ubuntu system, after downloading that AppImage from the website, I did the following:
#> mv krita-5.0.6-x86_64.appimage krita #> chmod 755 krita #> mv krita ~/bin
Storyboarding in Krita 5
I'll take you on a short tour of the StoryBoard Docker (Figure 1) features before describing how to use them. The StoryBoard Docker lets you develop a story as a sequence of scenes that you can add or remove with a click or drag and drop to rearrange. The hamburger button in the top right corner of the docker opens a menu with scene layout options (row, column, or grid) and view options (only scene thumbnails, only scene comments, or both, which is the default).
At any point during storyboard creation, you can export the whole storyboard, or just its thumbnails or comments, in SVG or PDF format. By clicking on Export in the docker menu, a panel will open where you can set the page orientation, page and font size, and whether the scenes should be placed in a row, column, or grid.
At the bottom of Figure 2, you can see the partially visible Animation Timeline (a separate docker), which gives users the ability to preview the storyboard as a short animation.
The storyboard's layout is defined by templates in SVG format. The layout must contain at least three separate layers: the background, the "overlay" that contains anything drawn on top of the storyboard elements (e.g., watermarks), and then the actual layout, with all the rectangles in which comments, thumbnails, and metadata must appear. For detailed information on creating custom templates for your Krita storyboards with programs like Inkscape, see [4].
Every scene has a header (Figure 3) which shows the scene's name, initial frame number, and total duration (measured in seconds or frames). You can configure all of these parameters. Each thumbnail also has a trash bin that lets you remove the thumbnail from the storyboard and a + that lets you add a new scene below the current thumbnail.
Krita storyboards can have multiple columns of comments, each reserved to a different component of the overall project (e.g., sound, designer, materials needed, etc.). To add a new comment column, click on the drop-down Comments menu in the Storyboard Docker top bar (Figure 1) and click the + button. Then, double-click on the new entry that appears in the same menu to give it a descriptive name. To change the order of the multiple comment columns shown, you can just drag and drop them where needed, again from that menu. From the same menu, you may hide a comment column, without deleting it, by clicking on the eye icon to the left of its name.
Creating a Simple Storyboard with Krita
To illustrate the process of creating a storyboard in the Krita Storyboard Docker, I chose five images from the official Krita gallery [5] (see Figure 4). Based on these images, I concocted a rough fantasy story outline and illustrated it with a five-scene storyboard (Figure 5).
To get started, I loaded the first image in Krita as a Paint Layer (i.e., the canvas on which you draw using the Krita tools). To do this in Krita 5, select Layer | Import/Export | Import | Import as Paint Layer from the main menu.
Once an image is loaded into a layer, you can press CTRL+T or click on the stamp-like icon in Krita's toolbar to activate the Transform Tool, which lets you move the image in any position or modify its shape and size. After doing that, I activated the brush tool to draw a red, human-like silhouette at the bottom and an arrow (Figure 2) to create the first scene of my storyboard (I added these elements to signify that the character should hide in the bushes on the left).
Next, I opened the StoryBoard Docker by clicking on Settings | Dockers | Storyboard and created four more scenes in the same way (i.e., loading a new image as a Paint Layer and then drawing on it to highlight certain scene parts as well as character or camera movements).
In this step, I made sure to place the five image layers in the right order so that each image appears in its own scene and doesn't cover the other images. The layer for the last scene should be at the bottom, the next to last above it, and so on, with the layer that must be visible in the first scene at the top of the stack (see the Layers docker, lower left sidebar in Figure 2). From the Layers docker, you can drag and drop the layers into the right order.
Of course, no storyboard would be complete, or really useful, without at least one short description attached to each scene (Figure 6). To add comments, I double-clicked on the comment field beside each thumbnail and started typing. Please note that the length of each comment seems limited, at least in the Krita version I tested, to 270 characters.
Finally, I saved my final storyboard in PDF format (Figure 7). With a PDF, you can share the storyboard with others or save a compact archive version, both of which can be viewed without Krita.
Buy this article as PDF
(incl. VAT)
Buy Linux Magazine
Subscribe to our Linux Newsletters
Find Linux and Open Source Jobs
Subscribe to our ADMIN Newsletters
Support Our Work
Linux Magazine content is made possible with support from readers like you. Please consider contributing when you’ve found an article to be beneficial.
News
-
Thousands of Linux Servers Infected with Stealth Malware Since 2021
Perfctl is capable of remaining undetected, which makes it dangerous and hard to mitigate.
-
Halcyon Creates Anti-Ransomware Protection for Linux
As more Linux systems are targeted by ransomware, Halcyon is stepping up its protection.
-
Valve and Arch Linux Announce Collaboration
Valve and Arch have come together for two projects that will have a serious impact on the Linux distribution.
-
Hacker Successfully Runs Linux on a CPU from the Early ‘70s
From the office of "Look what I can do," Dmitry Grinberg was able to get Linux running on a processor that was created in 1971.
-
OSI and LPI Form Strategic Alliance
With a goal of strengthening Linux and open source communities, this new alliance aims to nurture the growth of more highly skilled professionals.
-
Fedora 41 Beta Available with Some Interesting Additions
If you're a Fedora fan, you'll be excited to hear the beta version of the latest release is now available for testing and includes plenty of updates.
-
AlmaLinux Unveils New Hardware Certification Process
The AlmaLinux Hardware Certification Program run by the Certification Special Interest Group (SIG) aims to ensure seamless compatibility between AlmaLinux and a wide range of hardware configurations.
-
Wind River Introduces eLxr Pro Linux Solution
eLxr Pro offers an end-to-end Linux solution backed by expert commercial support.
-
Juno Tab 3 Launches with Ubuntu 24.04
Anyone looking for a full-blown Linux tablet need look no further. Juno has released the Tab 3.
-
New KDE Slimbook Plasma Available for Preorder
Powered by an AMD Ryzen CPU, the latest KDE Slimbook laptop is powerful enough for local AI tasks.