
Coming of Age
Desktop Organization with Plasma Activities
ByIf you haven't looked at Plasma Activities in awhile, you should take a second look. Recent updates make the tool the ultimate for organizing your desktop.
KDE Plasma identifies multiple desktops as Activities. Plasma Activities are one of the most versatile features on the Linux desktop -- and also among the least known or used. Over a decade after they were first introduced, Plasma Activities are finally coming into their own. Today, they can provide some of the ultimate in desktop customization with almost no effort.
Activities have been overlooked for several reasons. To start with, they were part of the botched and premature release of KDE 4.0, which for months had users in open revolt. What was supposed to be a bold innovation, a sign that the Linux desktop was no longer trying to catch up to proprietary ones, became a symbol of developers ignoring the needs of users. Neither does it help that Gnome uses the term “Activities” for its overview rather than a name for multiple desktops. Just as importantly, from the beginning, Activities have been under-documented, leaving users to puzzle out how to implement them. In particular, until recently, the difference between Activities and virtual workspaces was poorly defined and settled only when each Activity was given its own workspaces, making clear that workspaces are subordinate to Activities. However, probably the major cause of neglect is that the details of Activities have changed constantly, often becoming needlessly complex. For instance, in early releases, only one Desktop file was available, meaning that all resources for all Activities had to be placed in one file, and the resources not meant for a given Activity laboriously filtered out. Similarly, early on there were several types of Activities, many whose purpose was obscure. Only in recent releases have Activities become simple enough that they could be efficiently customized.
Because of these obstacles, the basic question remains: Why use Activities? Some reasons are:
- To organize applications by other than alphabetical order: With Activities, resources can be organized by task, by location, or project. For example, you could have one Activity for writing and another for editing graphics. Alternatively, you could have an Activity with resources for school use, another for business, or one that displays the files for a project that is deleted when the project is complete. In all these cases, resources are only a click or two away and easily found.
- To reduce desktop clutter or the need to scroll through long menus, both of which have become increasingly necessary with the increase of memory in modern computers. Activities can be seen as an alternative to a tiling desktop, especially if you limit icons to 10 or less on each Activity. And like a tiling desktop, Activities can be controlled entirely through keyboard shortcuts.
- To work in a limited physical space that lacks room for multiple monitors. The only difference is that you cannot slide from on Activity to another. Each Activity is separate from the others. However, you can slide from one virtual workspace to another within an Activity.
- To place all resources for each purpose one click away, eliminating scrolling through multi-level menus.
- To customize the desktop environment exactly as you want. Using System Settings | Workspace Behavior | Activities, you can edit the history for each Activity separately (Figure 1), while from System Settings | Hardware | Activity Settings, you can set whether or when each Activity shuts down, sleeps, or suspends (Figure 2).
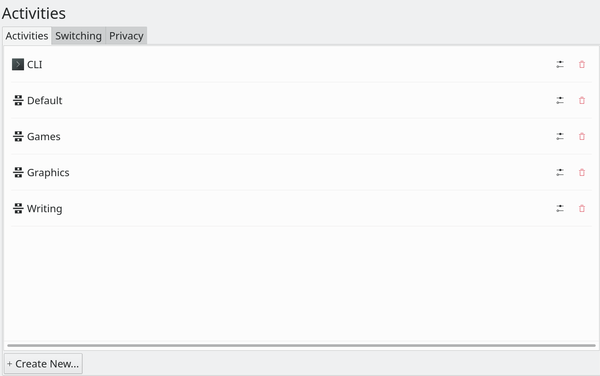 Figure 1: If desired, you can edit independently each Activity’s history.
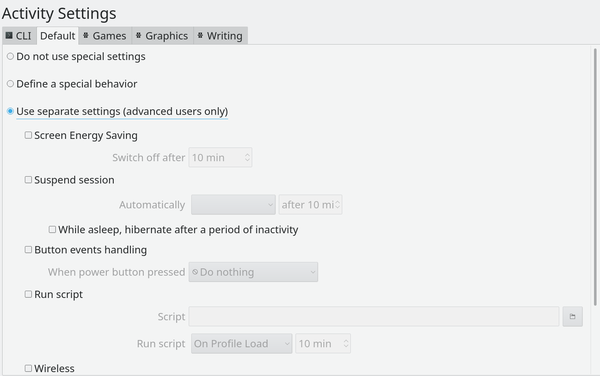 Figure 2: You can also customize how each Activity shuts down, sleeps, or suspends.
With these advantages, Activities allow more personalization than ever before.
Setting Up Activities
Before you define any Activities, choose how you want to navigate them. The default is to select Show Activity Switcher | Create Activity from a desktop’s right-click menu (Figure 3). However you can find other, more compact solutions by selecting Add Widgets from the same menu. Three alternative navigation tools are available by default: Activities (the activity manager), Activity Bar, or Activity Pager (Figure 4). I prefer adding one to the panel, since the panel remains the same on all Activities. The Activity Pager, modeled on the pager for the virtual workspaces, is particularly compact, although depending on how you configure it, the Activity Pager can be easily mistaken for the Virtual Workspace Pager, especially if you use only text (Figure 5). Still another possibility is to assign a keyboard shortcut from System Settings | Shortcuts | Custom Shortcuts.
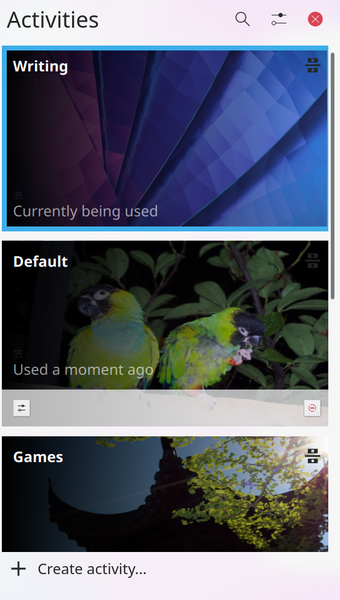 Figure 3: The Activity Switcher is the default tool for moving between Activities.
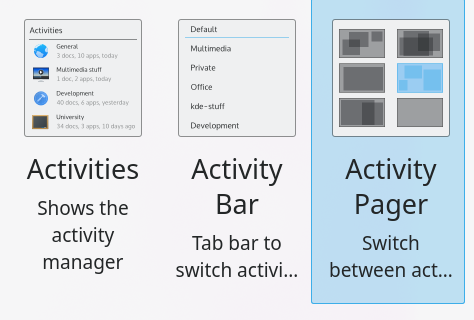 Figure 4: Plasma offers several graphical ways to navigate between Activities.
 Figure 5: The Activity Pager fits compactly on the panel, but it can easily be confused for the Virtual Workspace Pager.
Activities can be added from several places, including in the System Settings, but the most accessible is usually the Activity Switcher. Enter a name, and an icon if you choose, and your navigation tool of choice will immediately update.
Populating an Activity
Once an Activity is created, move to it. From the desktop’s right-click menu, click Select Desktop and Wallpaper.... You can select a separate wallpaper for each Activity, but the field that matters most is Layout (Figure 6). If you select Folder View from the Layout drop-down list, you can choose a folder and the Activity will act as a dedicated file manager. Folder View may be especially useful if all the files for a project are in one directory. However, for other purposes, select Desktop.
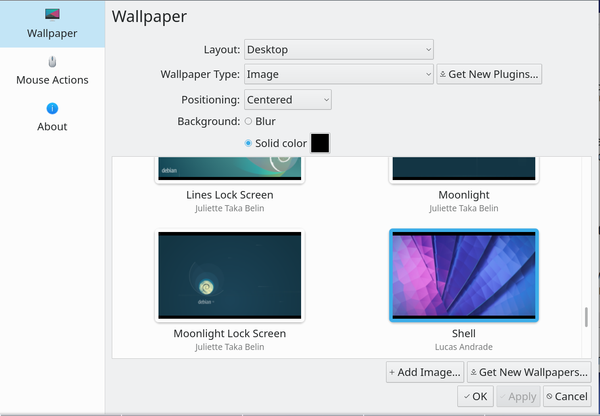 Figure 6: Each Activity can have its own desktop customization.
If you select Desktop, the next step is to populate it for whatever purpose you have. Each Activity has the same Plasma menu, but since menus are cumbersome given the size of modern drives, Activities rely on icons, so that each resource is a single-click away.
Widgets are common items to add. Right-click the desktop and select Add Widgets.... A variety of widgets are installed with Plasma, and many more are available to download. Widgets include games, shortcuts to Gmail and Kate profiles, hardware monitors, alternate menus, clocks, small pieces of limited functionality such as sticky pads, and a list of open windows. If a widget is general purpose enough, add it to the panel. If it is more specialized, place it on the Activity desktop.
Other items can be dragged on to the desktop and then right-clicked to edit their properties, including the icon, icon text, or command (Figure 7). Available items are:
- Menu items: Right click on an item in the menu and select Add to Desktop or Add to Panel.
- Folders/Files: Drag a directory or a file from the file manager to the desktop.
- URLs: Drag the button to the left of an URL in a web browser to the desktop. For some reason, this action does not work always in Firefox or Chromium, but it does work in Konqueror.
- Flatpak packages: Add any icon and then right-click to edit properties. For the command, run the command flatpak --list to see the installed Flatpak packages and then run in Flatpak (e.g., flatpak run com.github.avojak.warble).
- Snap packages: Add any icon and then right-click to edit properties. For the command, pipe the installed package through Konsole (e.g., konsole | snap run wordle).
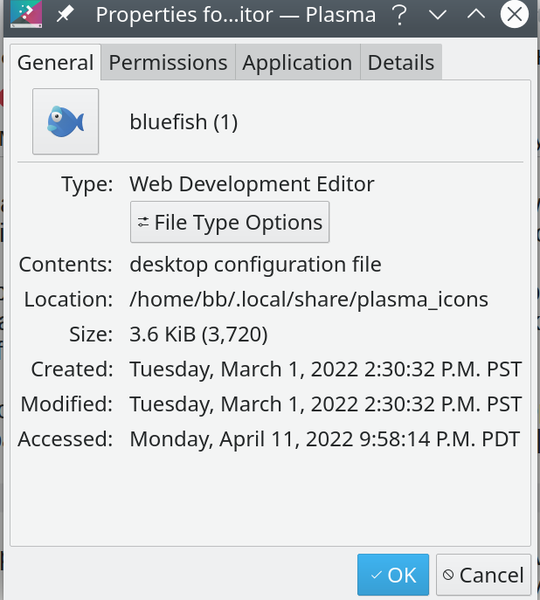 Figure 7: Important settings for an icon include the Name (icon text) and the command.
Try to keep the number of items to under 10 for each Activity or the customization is self-defeating. Six to eight items is ideal. For example, on my Writing Activity, I have icons for the Bluefish text editor and LibreOffice, plus URLs for a thesaurus, a rhyming and Old English dictionary, and the directory for my current novels. On my CLI Activity, I have icons for Boxes, Konsole, and Spectacle, a screen capture application.
Some of these items will be different sizes and stacked in the upper left corner of the desktop as they are added. To resize and reposition them, select Enter Edit Mode from the desktop’s right-click menu. So long as you are in Edit mode, right-clicking each item will display a frame with six round handles around it when clicked (Figure 8). Drag on these handles to resize and on the center of the frame to move the entire item. Text can only be changed from System Settings | Fonts. If you do have numerous items, try grouping related items together to organize them.
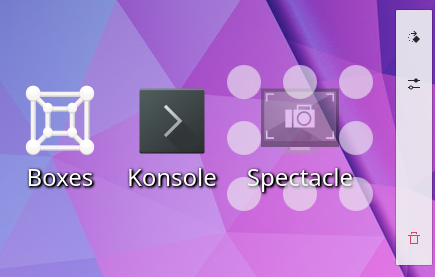 Figure 8: In Edit mode, you can resize and reposition icons by right-clicking them.
Simplicity at Last
Just as Pop!_OS has made tiling desktops accessible, so the current implementation of Activities has put its own past full of needless complications and setbacks behind it. At last, after 14 years, Activities are accessible to anyone. If you have tried Activities before and given up in despair, now might be the time for another look.
next page » 1 2
Subscribe to our Linux Newsletters
Find Linux and Open Source Jobs
Subscribe to our ADMIN Newsletters
Support Our Work
Linux Magazine content is made possible with support from readers like you. Please consider contributing when you’ve found an article to be beneficial.

News
-
Kubuntu Focus Goes Ultra
The Kubuntu Focus team has upped the performance ante of its M2 and Zr laptops with the latest, greatest CPUs from Intel.
-
Linux Gamers May Soon See Less Mouse Lag in KDE Plasma
Gamers using KDE’s Plasma desktop have been suffering from a slight input delay in mouse movement that could lead to getting fragged.
-
Three Lines of Code Improve Linux Storage Performance
A developer changed three lines of code, giving Linux storage performance a 5% bump.
-
AUR Hit Again with Malicious Packages
Once again the Arch User Repository is plagued by a high volume of malicious packages.
-
Alpine Linux 3.24 Features Fresh Desktops and a Newer Kernel
If you're a fan of Alpine Linux, it's time to upgrade because the latest version has been released with KDE Plasma 6.6, Gnome 50, and Linux kernel 6.18 LTS.
-
EU Open Source Strategy Plays Key Role in Tech Sovereignty Package
Comprehensive measures adopted by the European Commission aim to reduce dependency on non-EU countries.
-
Linux Foundation Report Indicates AI Driving Tech Hiring
Within growing security and skills gaps, AI has been found to be a positive driving force behind tech hiring trends in Europe.
-
United Nations Open Source Portal Goes Live
A new open source portal seeks to coordinate and scale open source efforts across the United Nations system.
-
KDE Linux Drops AUR
KDE Linux developers have dropped the Arch User Repository from the build pipeline due to security concerns; other distributions should consider doing the same.
-
California May Exempt Linux from Its Age-Verification Law
After backlash from the Linux community, California may be backing off on its promise to force all operating systems to verify age, but one platform may still have to comply.