
The One-Watt Server
Home Router as a Mini-Server
ByMany devices now run Linux – but mostly as closed source firmware that you cannot access. We show how to use OpenWrt to free the TL-MR3020 router from its proprietary firmware and convert it into an all-around server for your home network.
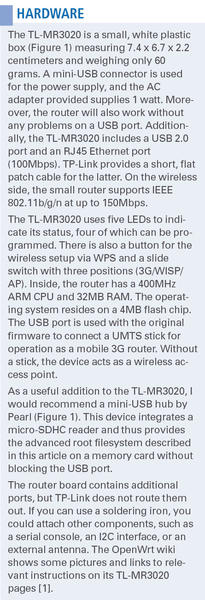
TP-Link manufactures routers in various performance classes. The TL-MR3020 (Figure 1) is marketed by the manufacturer as a mobile router because it is small and light. However, it does not support 3G (see the “Hardware” box), although you can upgrade via the USB port.
 Figure 1: The TL-MR3020 TP-Link (left) is no larger than the palm of your hand. The mini-USB hub by Pearl (right) acts as an expander.
Thus, the router is aimed at people who do not need 3G or have a UMTS stick and therefore do not want to invest in an expensive mobile UMTS router. However, the “normal” use of the router is not the focus of this article; instead, I will describe how to convert it into a mini-server.
To do this, you’ll replace the existing firmware with OpenWrt, a special Linux distribution for microdevices. OpenWrt has a package management system that is in no way inferior to that of classical distributions; thus, only the limitations of the hardware can curb your creativity.
Prelude
The TL-MR3020 is well-suited to this purpose for two reasons: On one hand, it costs EUR 30 (US$ 40) – which is not too much, if you happen to “brick” the device. On the other hand, the manufacturer does not put any obstacles in the way of installing third-party firmware.
To begin, download the correct version of OpenWrt and follow the brief, but perfectly sufficient, instructions that come with the router to connect to the device’s web interface. When you get there, upload the new firmware to the TL-MR3020 by selecting Upgrade in the new web form (Figure 2).
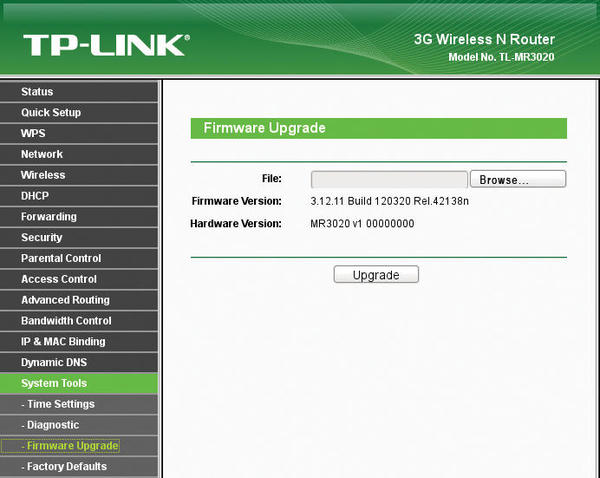 Figure 2: OpenWrt is uploaded as a firmware update via the original web interface on the TL-MR3020.
Uploading the firmware is the only really critical step in the whole process. A defective firmware image will send the router off to the happy hunting grounds – your only chance is a soldering iron. Thus, before loading the image, it is essential to check out the postings on the OpenWrt wiki and follow the appropriate instructions.
After installing OpenWrt, the next step is the basic configuration, particularly for the network. Then, you need to set up a number of software packages that upgrade USB support for data media (USB sticks or hard disks). This step lets you boot the router from an external disk. On the now-extended root filesystem, you then add more software packages from the OpenWrt repository for the actual application.
First Contact
After the firmware upgrade and device reboot, you can connect your PC or laptop to the router with the use of a cable. Configure the network (you can normally use the network manager for this) and login via Telnet on 192.168.1.1 (Figure 3). The router runs a DHCP server that supplies a suitable address to your PC or laptop.
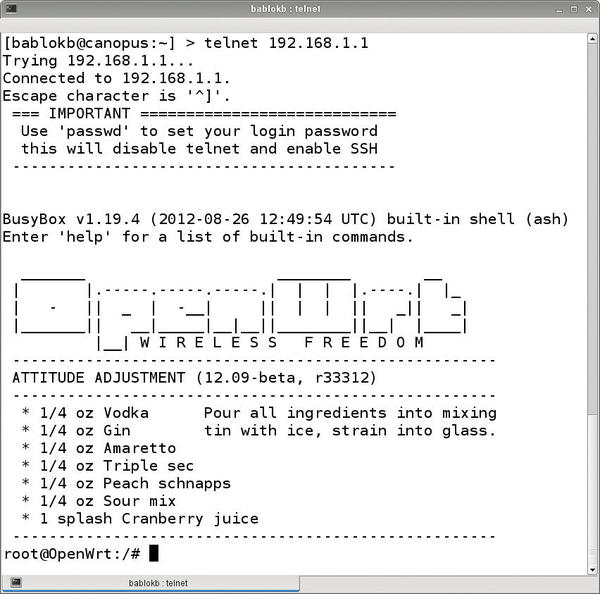 Figure 3: Done: The first login on OpenWrt.
At this point, you should set a password for root. OpenWrt then switches off the Telnet server for safety reasons and starts the SSH server. Next, adjust the network configuration so that the router is on your home network; then, you can move on and add more software. For details of the OpenWrt configuration system, see the “Configuring OpenWrt” box.

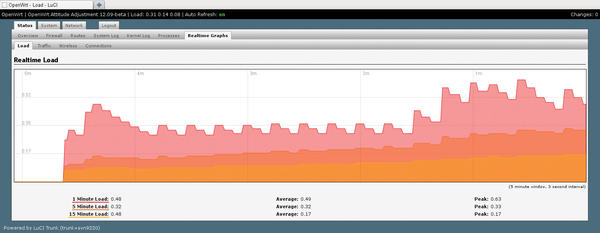 Figure 4: Using the web interface on OpenWrt to retrieve the system state.
To use the router as a server on your home network, the network configuration should look like Listing 1 (/etc/config/network) and Listing 2 (/etc/config/wireless).
Listing 1: /etc/config/network
01 # /etc/config/network -----------------
02
03  config interface 'loopback'
04     option ifname 'lo'
05     option proto 'static'
06     option ipaddr '127.0.0.1'
07     option netmask '255.0.0.0'
08
09  config interface 'wifi'
10          option proto 'static'
11          option ipaddr '192.168.3.100'
12          option netmask '255.255.255.0'
13          option gateway '192.168.3.1'
14          list dns '192.168.3.1'
15          list dns '8.8.8.8'
Lines 9-15 in Listing 1 configure the WLAN interface.
Listing 2: /etc/config/wireless
01 # /etc/config/wireless ---------------
02
03  config wifi-device  radio0
04     option type     mac80211
05     option channel  11
06     option macaddr 90:f6:52:e6:d7:b2
07     option hwmode  11ng
08     option htmode  HT20
09     list ht_capab  SHORT-GI-20
10     list ht_capab  SHORT-GI-40
11     list ht_capab  RX-STBC1
12     list ht_capab  DSSS_CCK-40
13     # REMOVE THIS LINE TO ENABLE WIFI:
14     # option disabled 1
15
16  config wifi-iface
17     option device     radio0
18     option network    wifi
19     option mode       sta
20     option ssid       'my-ssid'
21     option encryption psk2
22     option key        'secret'
In Listing 2, line 19 ensures that the server is integrated into the network as a WLAN client rather than as an access point or router.
After a reboot, the device should be found at the configured network address. If not, emergency mode can help: During the boot process, press the WPS button once it starts flashing. If the LED light flashes quickly, then release it again. Now the device is in Failsafe mode with the default address 192.168.1.1 and running the Telnet daemon. You can connect to Telnet and make the necessary corrections. However, no DHCP server is available on the router in this mode. You must assign a matching IP address to your own computer manually.
More Software
The original firmware image does not contain all the components that are necessary for running the root filesystem on a USB stick, so you will need to add them now. After successfully completing the network configuration, the mini-router can access the Internet and use the convenient package management system to install additional software retroactively.
The pivotal point is the opkg command, which you need to run as root. To do so, first call opkg update to upgrade the package list. Then, install the specified packages using the following command:
# opkg install <package>
If you are looking for a particular package, the list subcommand outputs a package list with brief descriptions. For the USB installation, you primarily need a set of kernel packages (Listing 3).
Listing 3: Preparing the USB Stick
01 # Set up the root filesystem on a USB stick
02 # Basic USB support (USB 1.1 and USB 2)
03 opkg update
04 opkg install kmod-usb-uhci kmod-usb-ohci kmod-usb2
05 insmod uhci
06 insmod usb-ohci
07 insmod usbcore
08 insmod ehci-hcd
09
10 # USB Storage (FAT requires additional modules
11 # that you can upgrade later, however)
12 opkg install kmod-usb-storage-mount block kmod-fs-ext4-core kmod-scsci
13
14 # Prepare USB stick (on the PC)
15 # -> Partition with three partitions (root, home, swap)
16 #    fdisk /dev/sdb etc.
17 # -> Format partitions with ext4 or swap
18 #    mkfs.ext4 /dev/sdb1
19 #    mkfs.ext4 /dev/sdb2
20 #    mkswap    /dev/sdb3
21
22 # Prepare root on USB (copies old root file system)
23 mkdir -p /mnt/usb
24 mount /dev/sda1 /mnt/usb
25 tar -cvf - -C /overlay . | tar -xf - -C /mnt/usb
26 umount /mnt/usb
It’s best to partition and format the USB stick (/dev/sdb in the listing – you might need to adjust this) on your PC. Besides the root partition, you’ll want a home partition and, above all, swap space.
Then, you can simply plug the stick into the router and change the configuration of the mountpoints in the /etc/config/fstab file. Lines 10-16 in Listing 4 are important.
Listing 4: Configuring Mountpoints
01 # Configure mountpoints
02 config global automount
03    option from_fstab 1
04    option anon_mount 1
05
06 config global autoswap
07    option from_fstab 1
08    option anon_swap 0
09
10 config mount
11   option target       /overlay
12   option device       /dev/sda1
13   option fstype        ext4
14   option options       rw,sync
15   option enabled       1
16   option enabled_fsck  0
17
18 config mount
19    option target       /home
20    option device       /dev/sda2
21    option fstype       ext4
22    option options      rw,sync
23    option enabled      1
24    option enabled_fsck 1
25
26 config swap
27    option device       /dev/sda3
28    option enabled      1
The last line of Listing 3 copies the entire root filesystem to the stick. Creating a backup now is advisable. The system will still boot, even without the stick inserted: In this case, it simply ignores the nonexisting devices.
After a reboot with a stick attached, you finally have more disk space. Any packages you now add can be stored there. All told, having the root filesystem on a USB device is handy. You can modify the configuration with the usual editors on a PC and easily copy data between locations (e.g., for backups).
At this point, the basic configuration is complete except for a few things, such as the hostname. The remainder of the procedure depends on how you will be using the router, and you can use the package manager to retrieve and configure the required software. The procedure on OpenWrt is no different from that of any other distribution.
Buttons and LEDs
By way of the web interface or SSH, you can completely control the TL-MR3020 as a mini-server. However, it is easier to use the existing buttons. The original WPS button is suitable for triggering individual actions, and the slide switch on the side (with its three positions) does the switching between different operating conditions (more about this later).
The LEDs serve as a kind of output device. Three different states are possible: on, off, or flashing. In combination with the buttons, you can build some nice features. From a technical point of view, you need to control the LEDs on files below /sys/class/leds (e.g., for the WPS LED, this is the /sys/class/leds/tp-link:green:wps directory). The makers of OpenWrt hide the complexity, and you normally only need to edit the configuration in the /etc/config/system file (Listing 5, lines 13-35).
Listing 5: Editing /etc/config/system
01 # Configuring LEDs and buttons
02 config system
03    option hostname 'jupiter.bablokb-local.de'
04    option timezone 'CET-1CEST,M3.5.0,M10.5.0/3'
05
06 config timeserver 'ntp'
07    list server '0.openwrt.pool.ntp.org'
08    list server '1.openwrt.pool.ntp.org'
09    list server '2.openwrt.pool.ntp.org'
10    list server '3.openwrt.pool.ntp.org'
11    option enable_server '0'
12
13 config led 'led_usb'
14    option name 'USB'
15    option sysfs 'tp-link:green:3g'
16    option trigger 'usbdev'
17    option dev '1-1'
18    option interval '50'
19
20 config led 'led_wlan'
21    option name 'WLAN'
22    option sysfs 'tp-link:green:wlan'
23    option trigger 'phy0tpt'
24
25 config led 'led_lan'
26    option name 'LAN'
27    option sysfs 'tp-link:green:lan'
28    option trigger 'netdev'
29    option dev 'eth0'
30    option mode 'link tx rx'
31
32 config led 'led_wps'
33         option name 'wps'
34         option sysfs 'tp-link:green:wps'
35         option trigger 'default-on'
36
37 config button
38         option button 'wps'
39         option action 'released'
40         option min '3'
41         option max '6'
42         option handler 'halt'
43
44 config button
45         option button 'wps'
46         option action 'released'
47         option min '0'
48         option max '2'
49         option handler 'logger wps pressed 0-2s'
50
51 config slider 'slider'
52         option handler '/usr/sbin/handle_slider'
Typically, OpenWrt couples LED activity with the operating states of individual components, such as the network or USB interface. However, you can adjust the defaults to suit your needs.
Configuring the switch is also easy. You need to configure the event system kernel so that it triggers on the appropriate button events. To do this, edit the /etc/hotplug2.rules file and remove the caret before the ^Buttons string. Because this is an exception list, you enable events for buttons by removing the comment sign. From now on, the system runs all the scripts in the directory /etc/hotplug/button for each button event. The variables BUTTON and ACTION are set.
An example that demonstrates the interaction with the LEDs is shown in Listing 6.
Listing 6: LED Interaction
01 #!/bin/sh
02 # Handle button events
03
04 set_led_blink() {
05 # Switch flashing on (1s on / 0.2 sec off)
06   echo timer > /sys/class/leds/tp-link\:green\:wps/trigger
07   echo 1000 > /sys/class/leds/tp-link\:green\:wps/delay_on
08   echo  200 > /sys/class/leds/tp-link\:green\:wps/delay_off
09 # Turn off after three seconds
10   sleep 3
11   echo none > /sys/class/leds/tp-link\:green\:wps/trigger
12 # Turn on after three seconds
13   sleep 3
14   set_led_on
15 }
16
17 set_led_on() {
18 # Turn on LED
19   echo default-on > /sys/class/leds/tp-link\:green\:wps/trigger
20 }
21
22 if [ "$BUTTON" = "wps" ]; then
23   if [ "$ACTION" = "pressed" ]; then
24     set_led_blink &
25   else
26     set_led_on
27   fi
28 else
29   exit 0
30 fi
This script is only for the WPS button (line 22), and it causes the WPS LED to flash for three seconds (lines 6-8 and 10) then go off for another three seconds. When you release the button, the script turns on the LED again (line 19).
Instead of storing each script individually in the Button directory and querying the status of the switch there, as in Listing 5, it makes sense to download a generic button script from the OpenWrt treasure trove. Then, you can configure the switch similar to the LEDs in /etc/config/system.
The WPS button is configured as an off switch here: If you hold down the button for at least three, and a maximum of six, seconds and then let go, the system shuts down (lines 37-42 in Listing 5).
This step also reveals the meaning of the program in Listing 6; the button LED flashes for three seconds and then switches off for three seconds – so you do not have to count to shut down the system. Likewise, you could also use the WPS button to start another operation with short clicks. Listing 5 (lines 44-49) configures a log entry for demonstration purposes.
The Slide Switch
The slide switch on the TL-MR3020 is slightly trickier for two reasons. First, the kernel does not see the slide switch as one button but as two; mapping the three possible states takes 2 bits. Each change of the switch thus triggers two events, which reach the processing script sequentially but must be evaluated together. Second, the event system only sees the changes.
Now you can try a little script that checks the status of the slide switch while booting, for example, to configure the network environment. This aspect, however, is only hinted at in the OpenWrt wiki documentation. Listing 7 shows you how.
Listing 7: Checking Status of the Slide Switch
01 #!/bin/sh
02 # Read the slider (aka BTN_0/BTN_1)
03 # rmmod uses underscores, insmod uses strokes!
04 rmmod gpio_button_hotplug                           # Remove kernel module
05 echo 18 > /sys/class/gpio/export                    # export BTN_0
06 echo 20 > /sys/class/gpio/export                    # export BTN_1
07 cat /sys/class/gpio/gpio18/value > /var/run/BTN_0   # Status BTN_0
08 cat /sys/class/gpio/gpio20/value > /var/run/BTN_1   # Status BTN_1
09 echo 18 > /sys/class/gpio/unexport                  # unexport BTN_0
10 echo 20 > /sys/class/gpio/unexport                  # unexport BTN_1
11 insmod gpio-button-hotplug                          # Load kernel module
The script stores the status of the two buttons BTN_0 and BTN_1 in appropriately named files under /var/run. The script runs once at startup, starting from /etc/rc.local.
In contrast, the script in Listing 8 runs for every button event.
Listing 8: Updating the Status Button
01 #!/bin/sh
02 # Handle slider events
03 . /lib/functions.sh
04 DELAY=5
05 LOCK=/var/run/slider.lock
06
07 # --- Run Update (asynchronous) ---
08 run_handler() {
09   # Only start if not already active
10   if ! mkdir "$LOCK" 2>/dev/null; then
11     logger "update-script already running"
12     exit 0
13   fi
14
15   # Read processing script from /etc/config/system
16   config_load system
17   config_get handler slider handler
18   logger "handler-script: $handler"
19
20   logger "wait $DELAY seconds for all events"
21   sleep $DELAY
22   eval $handler                   # Execute handler
23   rm -fr "$LOCK"
24 }
25
26 # --- Main Program ------------------
27 logger "Process event '$ACTION' for $BUTTON"
28
29 # Ignore WPS button
30 if [ "$BUTTON" = "wps" ]; then
31   exit 0
32 fi
33
34 # Update button file to match event
35 if [ "$ACTION" = "pressed" ]; then
36   echo "1" > "/var/run/$BUTTON"
37 else
38   echo "0" > "/var/run/$BUTTON"
39 fi
40                     # Run asynchronously
41 run_handler &       # (do not block event handling)
It updates the Status button in /var/run. Additionally, it starts a processing script. The extra magic in lines 10-12 ensures that only one processing script starts. The wait time before processing (line 21) ensures that all relevant button events are also received and processed. Lines 16 and 17 retrieve the processing script from the configuration file in /etc/config/system. The processing script then starts at line 22.
An example of such a script is shown in Listing 9.
Listing 9: Processing Script
01 #!/bin/sh
02 # Processing script for the slider
03 logger "Execute $0"
04
05 # Read status of slider
06 if [ `cat /var/run/BTN_0` = "0" ]; then
07   slider="WISP"
08 elif [ `cat /var/run/BTN_1` = "0" ]; then
09   slider="3G"
10 else
11   slider="AP"
12 fi
13 logger "Status of slider: $slider"
14
15 # Remove old symlinks
16 rm /etc/config/dhcp
17 rm /etc/config/network
18 rm /etc/config/wireless
19
20 # Set new symlinks
21 ln -s dhcp.$slider     /etc/config/dhcp
22 ln -s network.$slider  /etc/config/network
23 ln -s wireless.$slider /etc/config/wireless
24
25 # Restart network and DHCP
26 /etc/init.d/network restart
27 /etc/init.d/dnsmasq restart

It reads the status of the slide switch and reconfigures the network. The actual network files are only symbolic links; thus, the reconfiguration consists of pointing the symlinks at the new configuration files. For example, /etc/config/network.AP contains the network configuration when the slider is in the AP position. It makes sense to start the processing script once at startup time (in /etc/rc.local) after reading the slider status.
Conclusions
In this article, I’ve explained the hardware, so you “only” need to combine the individual components. For more detailed information about getting a UMTS stick to run, for example, or implementing specific network scenarios, please see the OpenWrt wiki.
The little TL-MR3020 router cannot cover every application (see the “More Application Examples” box). However, the mechanisms described here are at least similar for other devices, including those by other manufacturers. At the upper end of the power spectrum are the QNAP NAS devices that are supplied with OpenWrt in place. However, the range of preconfigured services makes customization more difficult.
Info
[1] Details for TL-MR3020: http://wiki.openwrt.org/toh/tp-link/tl-mr3020
The Author
Bernhard Bablok works at Allianz Managed Operations & Services SE as a SAP HR developer. When he’s not listening to music, riding his bike, or walking, he focuses on topics relating to Linux and object orientation. You can contact him at mail@bablokb.de.
Subscribe to our Linux Newsletters
Find Linux and Open Source Jobs
Subscribe to our ADMIN Newsletters
Support Our Work
Linux Magazine content is made possible with support from readers like you. Please consider contributing when you’ve found an article to be beneficial.

News
-
Kali Linux Waxes Nostalgic with BackTrack Mode
For those who've used Kali Linux since its inception, the changes with the new release are sure to put a smile on your face.
-
Gnome 50 Smooths Out NVIDIA GPU Issues
Gamers rejoice, your favorite pastime just got better with Gnome 50 and NVIDIA GPUs.
-
System76 Retools Thelio Desktop
The new Thelio Mira has landed with improved performance, repairability, and front-facing ports alongside a high-quality tempered glass facade.
-
Some Linux Distros Skirt Age Verification Laws
After California introduced an age verification law recently, open source operating system developers have had to get creative with how they deal with it.
-
UN Creates Open Source Portal
In a quest to strengthen open source collaboration, the United Nations Office of Information and Communications Technology has created a new portal.
-
Latest Linux Kernel RC Contains Changes Galore
Linux kernel 7.0-rc3 includes more changes than have been made in a single release in recent history.
-
Nitrux 6.0 Now Ready to Rock Your World
The latest iteration of the Debian-based distribution includes all kinds of newness.
-
Linux Foundation Reports that Open Source Delivers Better ROI
In a report that may surprise no one in the Linux community, the Linux Foundation found that businesses are finding a 5X return on investment with open source software.
-
Keep Android Open
Google has announced that, soon, anyone looking to develop Android apps will have to first register centrally with Google.
-
Kernel 7.0 Now in Testing
Linus Torvalds has announced the first Release Candidate (RC) for the 7.x kernel is available for those who want to test it.