
Inside The Input Devices
Custom Keyboards with QMK
ByThe Quantum Mechanical Keyboard (QMK) firmware offers some powerful options for customizing your keyboard configuration.
Most free software projects are targeted directly at users, however, a minority support other projects, and may be widely used without being well-known. A case in point is Quantum Mechanical Keyboard (QMK) Firmware, which provides the firmware for input devices – not just keyboards, its main focus, but also mice and MIDI sequencers. While unknown to most, QMK supports over 315 devices. The free software projects-turned-companies dependent on QMK include Atreus, Clueboard, and Ergodox EZ.
QMK is part of the little-known free software keyboard community. This community focuses on mechanical keyboards in which each key is soldered separately from the rest and which emphasizes customization, including individual keybindings or definitions, and multiple layers or complete keyboard layouts. Recent keyboards have includedup to 32 keyboard layouts, which allows the same keyboard to be used for QWERTY or Dvorak users, or for different gaming shortcuts. Many of the keyboards developed in the community are minimalist keyboards, and an increasing number in recent years are ergonomic. The major division in the community is between those that run on an Atmel AVR or ARM controller and require QMK for flashing, and those that use single board controllers that are compatible with the Arduino IDE and the avrdude command for flashing firmware, such as Keyboardio. However, the main difference is in the software – in both camps, the goal is to customize keybindings and to create layers.
QMK itself is noteworthy for its complete and clear documentation. Most of the work setting up is done from the command line, although an online configurator works on Chrome and Firefox.
Setting Up QMK
Setting up QMK requires git and avr-gcc. With them, you can clone the QMK repository, creating a copy on your hard drive.
With git and avr-gcc installed, create a clone of the QMK repository (Figure 1) with the command:
git clone --recurse-submodules https://github.com/qmk/qmk_firmware.git
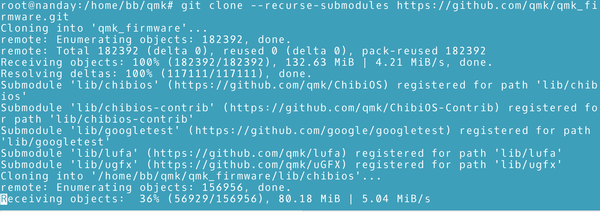 Figure 1: Use Git to copy a working version of QMK to your machine.
The clone is written to the qmk_firmware directory. The sub-directories include various resources for building firmware, the most important of which is /keyboards, which includes the configuration files for building firmware for each supported device.
To activate QMK, set up the repository ./util/qmk_install.sh
This command detects the operating system, and activates linux.sh to install and update all required packages. To install successfully on other distributions, you may have to edit linux.sh to edit the package names. In addition, linux.sh searches for pip3 when the Debian name for the package is python3-pip.
To test the QMK installation, locate the device manufacturer in the keyboard directory. The device will have a default firmware file somewhere in the sub-directories, the exact position varying with the model. For example, you might enter:
make ./MANUFACTURER/MODEL:default:
Note the unusual structure with the colons. Depending on the device, you may need to reset the bootloader by some means – some will have a key or key combination to press, or a Reset button on the bottom. If QMK downloads the default firmware successfully, you will be able to enter characters with the device.
Configuring a QMK Device From the Command Line
Each keymap has a directory with a unique name. The keymap itself is contained in the config.c file inside the directory. You can create a new layout either by copying the default and immediately renaming the copy, or by entering the command:
qmk new-keymap -kb KEYBOARD-NAME
The command will create a new directory for you. You may want to rename the directory to make the layout easier to find.
Either way, then open the copied config.c file and search for the line:
const uint16_t PROGMEM keymaps[][MATRIX_ROWS][MATRIX_COLS] =
The layers are mapped below in comma-separated lists that reproduce the rows on the keyboard. Layers are numbered from 0, and may also have a name. Keycodes designate characters, audio controls, backlights, and macros. For example, KC_A is upper and lower case A, KC_RIGHT the right arrow key, and KC_CALC the system calculator. Not every device supports every keycode, so you will either need to have documentation or be willing to experiment.
If you create multiple layers, you will want to leave keys on each layer for keycodes to move between layers, either momentarily or permanently. The documentation suggests that each layer should be able to transfer to only one layer. For instance layer 0 could switch to layer 2, layer 2 to layer 3, and layer 3 back to level 1.
When you are ready to flash, use the same command structure you used for testing (see above).
Using the Configurator
If you only want a single layer, QMK devices can also be configured using the web-based Configurator (Figure 2), which is compatible with Chrome and Firefox. Some manufacturers of QMK-based devices may also have their own tools for configuration. While working with the Configurator, you will probably want to open the list of keycodes in another tab for easy reference.
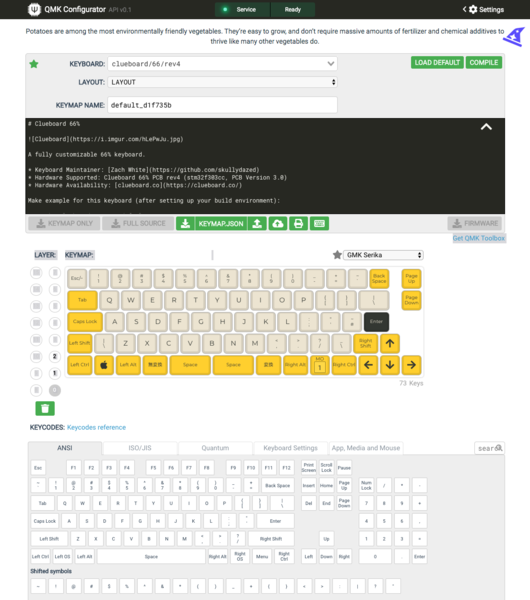 Figure 2: The Configurator is for creating simple keymaps.
Start by selecting your device from the top of the Configurator. If your device is not listed, check the manufacturer's GitHub page to see if the code is available but not integrated yet. You should also do a pull request. When you choose the device, you also see a summary of the device, which can be useful for troubleshooting.
Next, choose the keyboard closest to the layout you want in order to save some time. If no layout fits your needs, select LAYOUT_all, and be prepared to configure all the keys individually. Give the layout a unique name as well, making sure the name is not already in use.
Using the map provided by Configurator, you can customize in three ways:
- Dragging and dropping from the keycode map to your layout
- Clicking on an unassigned key on the layout, then clicking the keycode on the map below. A code on the keycode map does not have to be assigned to the same key on your layout.
- Clicking on an unassigned key on the layout, then pressing the actual key on your keyboard
When you have finished assigning keys, press the Export Keymap button to save the keymap to your computer, then load it by pressing the Import Key Button. To flash the keymap, press the green Compile button, followed by the green Download Firmware button. Be sure to put the device into Bootloader mode, by pressing a key or whatever other method the device uses.
Advanced Keycodes
An increasing number of QMK devices support special keycodes. Many of these allow a key to support multiple characters. As described in the QMK documentation, some of these keys are defined in separate files. Advanced keycodes include:
- Backlighting: Toggles brightness, turns lights on or off
- Mod-Tap: acts like the shift key when pressed with another key, has another function when tapped and released by itself
- One shot keys: Keys that remain active until another key is released. Useful for adding an accent to another character. Pressing a one shot key five times keeps it active permanently until the device is unplugged.
The Keyboard Revolution
As far as most users are concerned, keyboards have changed little in the last 40 years. However, projects like QMK have radically expanded what keyboards can do. If QMK devices cost more than a keyboard that is thrown away in a year, the higher price is worth it for a device that lasts longer, can be repaired, and empowers users to work and play exactly the way they want. The next time you buy a keyboard, you could do worse than check the list of QMK devices. As in so many fields, QMK is an example of how open source is revolutionizing an established field.
next page » 1 2 3
Subscribe to our Linux Newsletters
Find Linux and Open Source Jobs
Subscribe to our ADMIN Newsletters
Support Our Work
Linux Magazine content is made possible with support from readers like you. Please consider contributing when you’ve found an article to be beneficial.

News
-
Hannah Montana Linux Is Back!
Developer Noah Cagle decided the world needed the once obscure but beloved Linux distribution and gave it a decidedly pink refresh.
-
System76 Refreshes the Lemur Laptop
If you're looking for a laptop with tons of power and battery, look no further than the latest iteration of the System76 Lemur Pro.
-
More than 43 Million Lines of Code in Linux Kernel 7.2
Using the cloc utility, Michael Larabel of Phoronix discovered that Linux kernel 7.2 has over 43 million lines of code.
-
Kubuntu Focus Goes Ultra
The Kubuntu Focus team has upped the performance ante of its M2 and Zr laptops with the latest, greatest CPUs from Intel.
-
Linux Gamers May Soon See Less Mouse Lag in KDE Plasma
Gamers using KDE’s Plasma desktop have been suffering from a slight input delay in mouse movement that could lead to getting fragged.
-
Three Lines of Code Improve Linux Storage Performance
A developer changed three lines of code, giving Linux storage performance a 5% bump.
-
AUR Hit Again with Malicious Packages
Once again the Arch User Repository is plagued by a high volume of malicious packages.
-
Alpine Linux 3.24 Features Fresh Desktops and a Newer Kernel
If you're a fan of Alpine Linux, it's time to upgrade because the latest version has been released with KDE Plasma 6.6, Gnome 50, and Linux kernel 6.18 LTS.
-
EU Open Source Strategy Plays Key Role in Tech Sovereignty Package
Comprehensive measures adopted by the European Commission aim to reduce dependency on non-EU countries.
-
Linux Foundation Report Indicates AI Driving Tech Hiring
Within growing security and skills gaps, AI has been found to be a positive driving force behind tech hiring trends in Europe.