Protect Your Privacy with ImageMagick
Tutorials – ImageMagick
Ben Everard wants to keep his location open, but only vaguely.
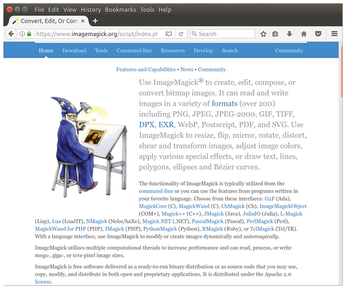
The ImageMagick tool lets you do almost everything you would want to with an image. You can tweak, poke, prod, and otherwise meddle with pixels (Figure 1). In this tutorial, we'll look at how to use this tool to form a command that can help protect our privacy online. This is also the perfect excuse to see how we can use the Linux terminal to build up a complex, powerful command from many smaller commands.
When you take pictures on a digital camera, a whole lot of information is stored along with the actual image. The exact information varies from camera to camera but might include things like the camera settings and location at which the picture was taken. This information is all useful until you start sharing the images online, at which point it can be used to trace exactly where you've been. Many tools will just remove the location data, but we want to be a little more clever. We want to keep the general area the picture was taken but remove the precision. We want a command that embeds the location to the nearest town. Rather than put this information in hard-to-read metadata, we want the info displayed in the image itself as a caption at the bottom. This can be done as shown in Listing 1.
Listing 1
Embed Location
Obviously, this command is a little complex, but don't worry. It's made up of lots of smaller bits that are all easy to understand. Let's break it down and look at it bit by bit. The two basic building blocks of this command are the pipe (|
) and command substitution ($())
. The pipe sends the output of one command to another. In some cases, we use this to send text from one command to the next; in other cases, we're sending images. Command substitution runs the command inside the brackets and inserts the text that the command outputs in the place of the dollar sign.
Let's first look at the command substitutions.
$(identify -format '%w' IMG_20170504_191133.jpg)
This uses the identify
command (part of ImageMagick, so you might need to install this package via your package manager) to extract the width of the image. To test this command substitution, run it without the first dollar sign or opening and closing brackets. Obviously, you'll need to change the image name to an image you have.
The second command substitution is a little more complex (Listing 2).
Listing 2
Second Command Substitution
This itself contains a command substitution:
$(exiftool IMG_20170504_191133.jpg -n | grep 'GPS Pos' | cut -d ':' -f2 | cut -f2,3 -d" " | tr " " ",")
exiftool
gets the metadata out of the image (we could use identify
, but exiftool
is better for formatting the GPS data in the way we need). The metadata is then piped to grep
, which discards all of it other than the data that matches "GPS Pos" – the latitude and longitude. A pair of cut
commands are used to first get everything after the colon, and then get the second and third fields (when separated by a space). This gives us the latitude and longitude with a space between them. But, as you'll see in a minute, we need them separated by a comma, so the final part of this subcommand is tr
, which just replaces every space (and there is only one) with a comma.
Now, let's go back to the outer command substitution (Listing 3).
Listing 3
Outer Command Substitution
As you can see, we've put 1.0000,1.0000 where the previous command placed the latitude and longitude of the picture. The first part of this pipe uses the Google Maps API to get the closest address for this latitude and longitude in JSON format. By default, you're limited to 2,500 daily requests from the API, so if you have a lot of images, you may need to spread them out over several days.
We then use the jq
command (which you may need to install via your package manager) to get the data we want out of this. The format for jq
is a language in itself, but what we do is get the first item in the results list, and then loop through the address_components
list inside this item. If the address_components
item has a type of country or town, output the long_name
.
This gives us the town and country on different lines (Figure 2). We would like them comma-separated, so use tr
to first delete the quote marks, and then replace the newlines with commas. The final sed
removes the last character, which is a comma.

Let's now look at the full command with this data put in:
convert -size 680x100 -background '#00000080' -fill white caption:"Bristol,United Kingdom" miff:- | composite -gravity south -geometry +0+3 - IMG_20170504_191133.jpgannoimg.jpg
What was once a matted knot of commands is now reduced to two. Both are commands from ImageMagick: convert
and composite
. The first makes an image that's the same width as the image we're editing (from the first command substitution) and a hundred pixels high that has a black slightly transparent background and the text of the town where the picture was taken.
The command saves this new image in miff format (ImageMagick's own format) and sends this data to stdout where it's picked up by the pipe and sent to the next
command. composite, as you might expect, takes two images and combines them. The -gravity
and -geometry
options tell composite to put the text horizontally at the bottom of the other image. The hyphen tells the command to take input from stdout, and the final two options are the original image and the newly modified image to save the output as.
This one massive command does all the modifying. The only thing left is to strip the metadata out of the image, which can be done with:
convert annoimage.jpg -strip strippedimg.jpg
Here ends our whistle-stop tour of ImageMagick and the Bash tools for composing commands. We haven't had time to look into all the options, but you should now have an idea of how you can put together several simple tools to build complex commands in a way that's almost endlessly flexible. Here, we've built a command that we've hand-coded for the specific image that we want to edit. As an extension, you could put this into a script that took an option for the image and performed this action on it or a command that iterated through a collection of images updating each one as it went.
Buy Linux Magazine
Direct Download
Read full article as PDF:
Subscribe to our Linux Newsletters
Find Linux and Open Source Jobs
Subscribe to our ADMIN Newsletters
Find SysAdmin Jobs
News
-
Kubuntu Focus Announces XE Gen 2 Linux Laptop
Another Kubuntu-based laptop has arrived to be your next ultra-portable powerhouse with a Linux heart.
-
MNT Seeks Financial Backing for New Seven-Inch Linux Laptop
MNT Pocket Reform is a tiny laptop that is modular, upgradable, recyclable, reusable, and ships with Debian Linux.
-
Ubuntu Flatpak Remix Adds Flatpak Support Preinstalled
If you're looking for a version of Ubuntu that includes Flatpak support out of the box, there's one clear option.
-
Gnome 44 Release Candidate Now Available
The Gnome 44 release candidate has officially arrived and adds a few changes into the mix.
-
Flathub Vying to Become the Standard Linux App Store
If the Flathub team has any say in the matter, their product will become the default tool for installing Linux apps in 2023.
-
Debian 12 to Ship with KDE Plasma 5.27
The Debian development team has shifted to the latest version of KDE for their testing branch.
-
Planet Computers Launches ARM-based Linux Desktop PCs
The firm that originally released a line of mobile keyboards has taken a different direction and has developed a new line of out-of-the-box mini Linux desktop computers.
-
Ubuntu No Longer Shipping with Flatpak
In a move that probably won’t come as a shock to many, Ubuntu and all of its official spins will no longer ship with Flatpak installed.
-
openSUSE Leap 15.5 Beta Now Available
The final version of the Leap 15 series of openSUSE is available for beta testing and offers only new software versions.
-
Linux Kernel 6.2 Released with New Hardware Support
Find out what's new in the most recent release from Linus Torvalds and the Linux kernel team.