
Creating a Reproducible Remote Desktop with Terraform
Network
Network setup is very straightforward (see Listing 7). You will want to create our own private network with one subnet, where you will put the server.
Listing 7
network.tf
# This file is pretty self-explanatory; it just creates a private network with a subnet.
resource "hcloud_network" "private" {
  name     = "private-network"
  ip_range = "10.0.0.0/16"
}
resource "hcloud_network_subnet" "private-subnet" {
  network_id   = hcloud_network.private.id
  type         = "server"
  network_zone = "eu-central"
  ip_range     = "10.0.1.0/24"
}
Servers and Storage
As far as the servers go, you have multiple options. You are free to set up just one server with VNC or multiple servers with varying functionalities. In this particular case, I will create two servers. One will be my office server – the actual server to which I connect and get some work done. Another one will be my bastion server. Both the office server and the bastion server will be visible to the Internet, but I am going to make use of Hetzner's firewall capability (which is free) and ensure that, while the bastion server is accessible from the Internet, my office server is fully locked from any external connection, apart from the bastion server.
This way, I can jump into the office server using the bastion as a proxy (hence ProxyJump, which is part of the SSH configuration).
Another important point is file storage. The servers come with some storage, but since I am going to be creating and destroying them, I might want to have some storage that is independent of the server systems. I will therefore create a volume called office data that I will attach to the office server. This setup is shown in Listing 8.
Listing 8
servers.tf
# This file contains the server information. Change it the way you'd like.
# The bastion server allows you to create a nice bastion host, but you might want to omit it.
resource "hcloud_server" "bastion" {
  name        = "bastion"
  server_type = var.bastion_server_type
  image       = "ubuntu-24.04"
  ssh_keys    = [hcloud_ssh_key.default.id]
  location    = var.location
  count = var.up ? 1 : 0
  public_net {
    ipv4_enabled = true
    ipv6_enabled = false
  }
  network {
    network_id = hcloud_network.private.id
    ip         = "10.0.1.2"
  }
}
# This is the main server
# Notice the var.image_id -- if it is default (empty string), I will use an ubuntu-24.04 image. However, I will soon discuss the ability to create a custom image.
resource "hcloud_server" "office-server" {
  name        = "office-server"
  server_type = var.office_server_type
  image       = var.image_id != "" ? var.image_id : "ubuntu-24.04"
  ssh_keys    = [hcloud_ssh_key.default.id]
  location    = var.location
  count = var.up ? 1 : 0
  public_net {
    ipv4_enabled = true
    ipv6_enabled = false
  }
  network {
    network_id = hcloud_network.private.id
    ip         = "10.0.1.10"
  }
}
resource "hcloud_firewall" "office_fw" {
  name = "office-firewall"
  rule {
    direction  = "in"
    protocol   = "tcp"
    port       = "22"
    source_ips = ["10.0.1.2/32"]  # only allow SSH from bastion
  }
  # optionally allow internal cluster traffic (e.g., all from private subnet)
  rule {
    direction  = "in"
    protocol   = "tcp"
    port       = "0-65535"
    source_ips = ["10.0.0.0/16"]  # internal network range
  }
  # default policy: deny everything else. Feel free to modify.
  # Especially if you want to open some ports to the outside world.
}
# This attached the firewall rule to the server
resource "hcloud_firewall_attachment" "office_fw_attach" {
  firewall_id = hcloud_firewall.office_fw.id
  server_ids  = [hcloud_server.office-server[0].id]
  count = var.up ? 1 : 0
}
# This is our "persistent" volume, which survives when servers are being destroyed. Notice that it does not have a "count" parameter -- it is always present. The count parameter is discussed further
resource "hcloud_volume" "office_data" {
  name = "office-data"
  size = 10               # in GB
  location = var.location
  automount = false       # important: we'll handle mount/encryption ourselves
}
# I attach the volume to the server
resource "hcloud_volume_attachment" "worker_data_attach" {
  volume_id = hcloud_volume.office_data.id
  server_id = hcloud_server.office-server[0].id
  count = var.up ? 1 : 0
  automount = false
}
This solution poses an interesting problem. Terraform is a tool that requires a description of everything it has to create. Now, imagine you create an infrastructure, and everything goes well – servers are created, a hard drive is attached, things are going great. Then you are done for the day, and you want to destroy your server.
If you ask Terraform to destroy your infrastructure, it will also destroy the office_data volume, which you wanted to keep as a permanent data source. You need a way to create or destroy some resources without touching others. One way to do this could be through the conditional creation of resources – notice how servers and attachment of volume have a count of 1 if var.up is true and otherwise?
This also means that you cannot use terraform destroy unless you are ready to destroy ALL data – that means your permanent drive, too. Thus, you will have three commands (as shown in Listing 9).
Listing 9
Create and Destroy Servers
# First, run init again, so that Terraform will download some extra plugins, since I have added some new resources
terraform init -var-file=office.tfvars
# Now you have these three commands to use: one would create your servers, another one would destroy them (but keep the volume)
# And third one would destroy everything
# Create the servers (and other necessary items):
terraform apply -var-file office.tfvars -var up=true
# Destroy the servers:
terraform apply -var-file office.tfvars -var up=false
# Destroy EVERYTHING, including your independent volume:
terraform destroy -var-file office.tfvars
I recommend adding these commands to an alias, so that you can run them easily. At this point, if you try creating your servers by running the apply command with -var up=true, Terraform analyze your infrastructure and propose a plan, to which you can say yes. If everything is fine, your servers will be created within several minutes. Please note that sometimes certain server types are unavailable.
You can configure the servers any way you like; the first step would likely be to connect to your servers via SSH (Listing 10).
Listing 10
Connecting to Your Servers
# I will use the file out/ssh/config, which already contains all the necessary configuration for our servers
# Connect to bastion:
ssh -F out/ssh/config bastion
# Connect to the "office" server through bastion:
ssh -F out/ssh/config office
Managing an Image
One last thing to discuss is managing an image of your server. Notice how you have an image_id variable that allows you to specify your image ID: Once you have configured your server, you can create a snapshot of that server and recreate new servers from that snapshot.
I do not recommend creating the snapshot in Terraform. Terraform does support creating snapshots, but it is tricky to ensure that the snapshot occurs at a specific time. Essentially, it is too much of a hack.
In this case, one solution is to use the Hetzner Cloud Console to manage your snapshots (Figure 2). I prefer to use the Cloud Console because it lets me give my snapshots reasonable names, manage them the way I want to, and choose a specific snapshot for a given task. Listing 11 shows how to automate snapshot creation in the Hetzner environment.
Listing 11
Making Snapshots via the Hetzner API
curl -s -X POST "https://api.hetzner.cloud/v1/servers/<your-server-id>/actions/create_image"
  -H "Authorization: Bearer <your-hcloud-token-here>"
  -H "Content-Type: application/json"
  -d '{"description": "My description", "type": "snapshot"}'
  | jq .image.id
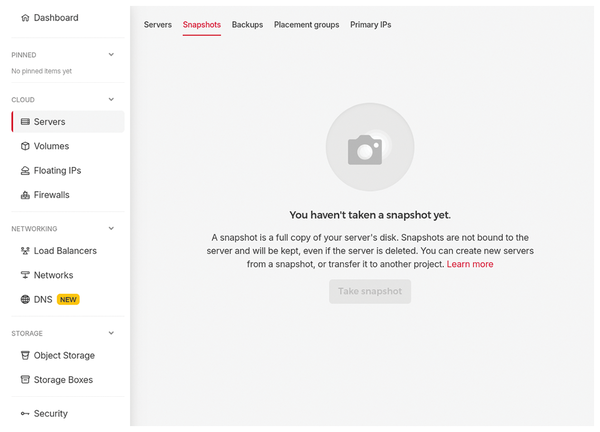 Figure 2: Once you have servers, click Take snapshot to make a new snapshot.
The server requires an ID. To get an ID, create the outputs.tf file (see Listing 12).
Listing 12
outputs.tf
output "office-server-id" {
  value = var.up ? hcloud_server.office-server[0].id : "-"
}
Then, run
terraform apply -var-file office.tfvars -var up=true
again, and you will see a server ID in the output. Note that since images are not managed by Terraform, they are not removed automatically when you run terraform destroy.
« Previous 1 2 3 Next »
Buy this article as PDF
(incl. VAT)
Buy Linux Magazine
Subscribe to our Linux Newsletters
Find Linux and Open Source Jobs
Subscribe to our ADMIN Newsletters
Support Our Work
Linux Magazine content is made possible with support from readers like you. Please consider contributing when you’ve found an article to be beneficial.

News
-
Kubuntu Focus Goes Ultra
The Kubuntu Focus team has upped the performance ante of its M2 and Zr laptops with the latest, greatest CPUs from Intel.
-
Linux Gamers May Soon See Less Mouse Lag in KDE Plasma
Gamers using KDE’s Plasma desktop have been suffering from a slight input delay in mouse movement that could lead to getting fragged.
-
Three Lines of Code Improve Linux Storage Performance
A developer changed three lines of code, giving Linux storage performance a 5% bump.
-
AUR Hit Again with Malicious Packages
Once again the Arch User Repository is plagued by a high volume of malicious packages.
-
Alpine Linux 3.24 Features Fresh Desktops and a Newer Kernel
If you're a fan of Alpine Linux, it's time to upgrade because the latest version has been released with KDE Plasma 6.6, Gnome 50, and Linux kernel 6.18 LTS.
-
EU Open Source Strategy Plays Key Role in Tech Sovereignty Package
Comprehensive measures adopted by the European Commission aim to reduce dependency on non-EU countries.
-
Linux Foundation Report Indicates AI Driving Tech Hiring
Within growing security and skills gaps, AI has been found to be a positive driving force behind tech hiring trends in Europe.
-
United Nations Open Source Portal Goes Live
A new open source portal seeks to coordinate and scale open source efforts across the United Nations system.
-
KDE Linux Drops AUR
KDE Linux developers have dropped the Arch User Repository from the build pipeline due to security concerns; other distributions should consider doing the same.
-
California May Exempt Linux from Its Age-Verification Law
After backlash from the Linux community, California may be backing off on its promise to force all operating systems to verify age, but one platform may still have to comply.